
Introduction
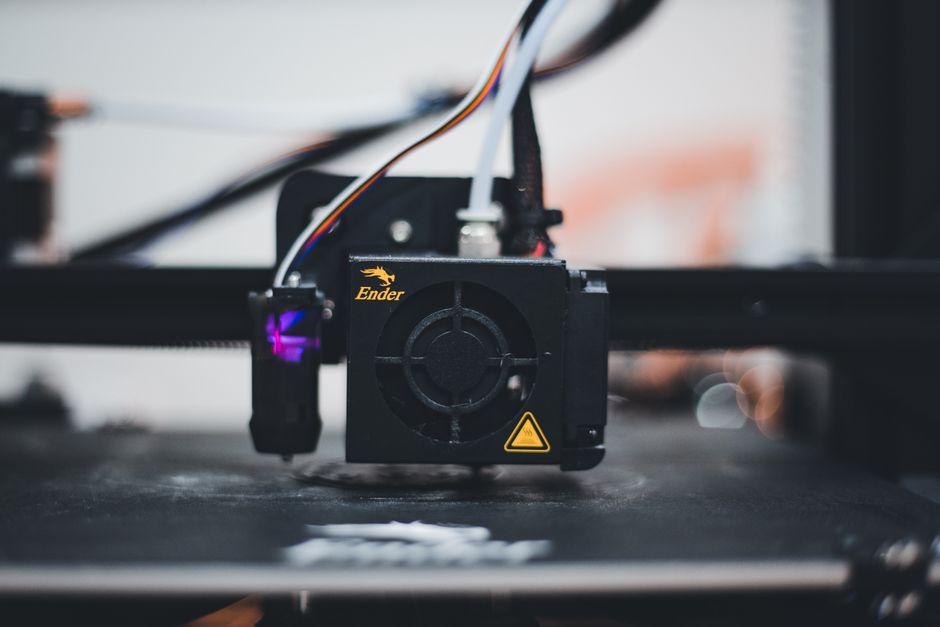
3D printing has revolutionized the way we think about manufacturing, prototyping, and creativity. This innovative technology allows users to bring their ideas to life by creating three-dimensional objects layer by layer from digital models. Among the many brands in the 3D printing market, Ender printers have carved out a significant niche due to their affordability, reliability, and performance.
The Ender series, particularly the Ender 3D printer, has gained immense popularity among hobbyists, educators, and professionals alike. This is largely due to its user-friendly design, impressive specifications, and a vibrant community that supports users in their 3D printing journeys. In this article, we will explore the Ender 3D printer in detail, discussing its features, specifications, and applications.
What is the Ender 3D Printer?
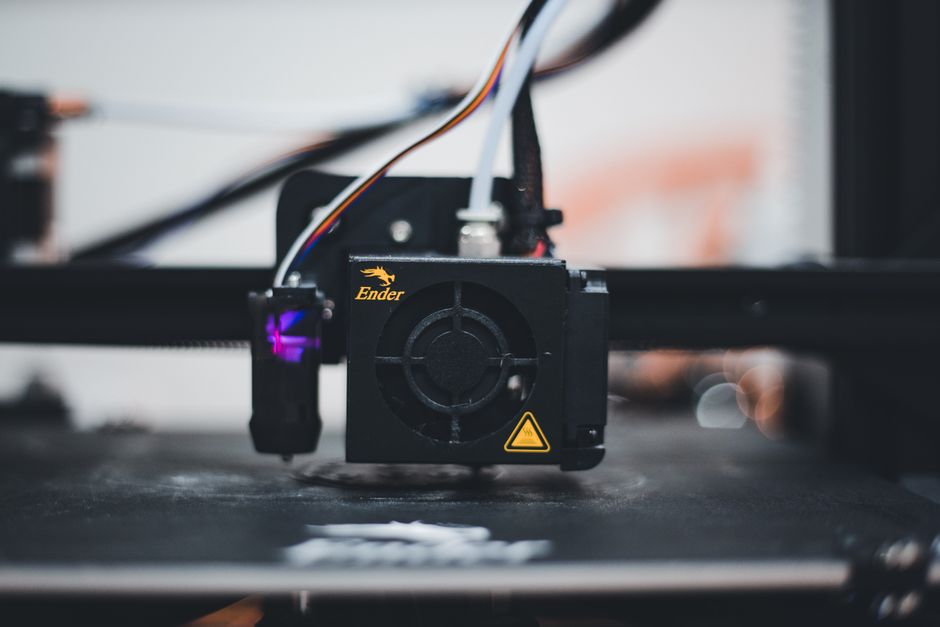
The Ender 3D printer is a popular model in the Ender series, developed by Creality, a company known for its high-quality 3D printers at accessible prices. The Ender series includes several models, such as the Ender 3, Ender 3 Pro, and Ender 3 V2, each with variations in features and specifications to cater to different user needs.
Targeted primarily at hobbyists, makers, and educational institutions, the Ender 3D printer is designed to be an entry-level machine that delivers professional results. Its versatility allows it to be used for a range of applications, from simple prototypes and educational projects to more complex models and artistic creations. This broad appeal has contributed to its widespread adoption among both novice and experienced users.
Key Features of the Ender 3D Printer
The Ender 3D printer boasts several key features that make it stand out in the crowded 3D printing market. Below, we will delve into some of the most important aspects, including build volume, print quality, user-friendliness, and filament compatibility.
Build Volume and Specifications
One of the defining features of the Ender 3D printer is its build volume. The Ender 3 offers a build size of 220 x 220 x 250 mm, which allows users to create moderately sized prints without requiring extensive modifications or upgrades. This build volume strikes a balance between functionality and space efficiency, making it suitable for home users or those with limited workspace.
In terms of physical dimensions, the Ender 3 measures approximately 440 x 410 x 465 mm, making it compact enough to fit on most desks or workstations. This thoughtful design enables users to integrate the printer into their existing setups without consuming too much space.
Print Quality and Resolution
Print quality is often a critical factor when choosing a 3D printer, and the Ender 3 does not disappoint. With a layer resolution ranging from 0.1 mm to 0.4 mm, users can achieve fine details in their prints, making it suitable for both functional parts and intricate designs. The printer’s ability to maintain consistent layer adhesion during printing contributes to its reputation for high-quality output.
Additionally, the Ender 3 features a heated bed, which ensures better adhesion of prints and minimizes warping, a common issue in 3D printing. The combination of resolution and print consistency makes the Ender 3 a reliable choice for creating high-quality 3D models.
User-Friendly Design
The Ender 3D printer is designed with user experience in mind. It features a semi-assembled design that simplifies the setup process, allowing users to get started with minimal hassle. Most parts come pre-assembled, and with clear instructions, users can have their printer operational within just a couple of hours.
Moreover, the printer’s interface is intuitive, featuring a simple LCD screen that guides users through the printing process. This user-friendly approach makes it accessible for beginners, while still offering advanced features that experienced users can appreciate.
Compatibility with Filaments
Flexibility in filament compatibility is another significant advantage of the Ender 3D printer. It supports a variety of materials, including PLA, ABS, PETG, TPU, and more. This versatility allows users to experiment with different filaments according to their project needs, whether they are looking for strength, flexibility, or aesthetic appeal.
Each filament type comes with its own set of printing requirements, such as temperature settings and bed adhesion methods. Fortunately, the Ender 3 provides users with the tools and settings necessary to accommodate these variations, enabling a wide range of creative possibilities.

In conclusion, the Ender 3D printer represents an excellent entry point into the world of 3D printing. With its impressive build volume, high print quality, user-friendly design, and compatibility with multiple filament types, it stands out as a versatile and reliable machine for both beginners and seasoned printers. As we continue our exploration of the Ender 3D printer, we will dive deeper into its setup process, maintenance tips, and troubleshooting guides to empower users on their 3D printing journey.
Setting Up Your Ender 3D Printer
Unboxing and Initial Assembly
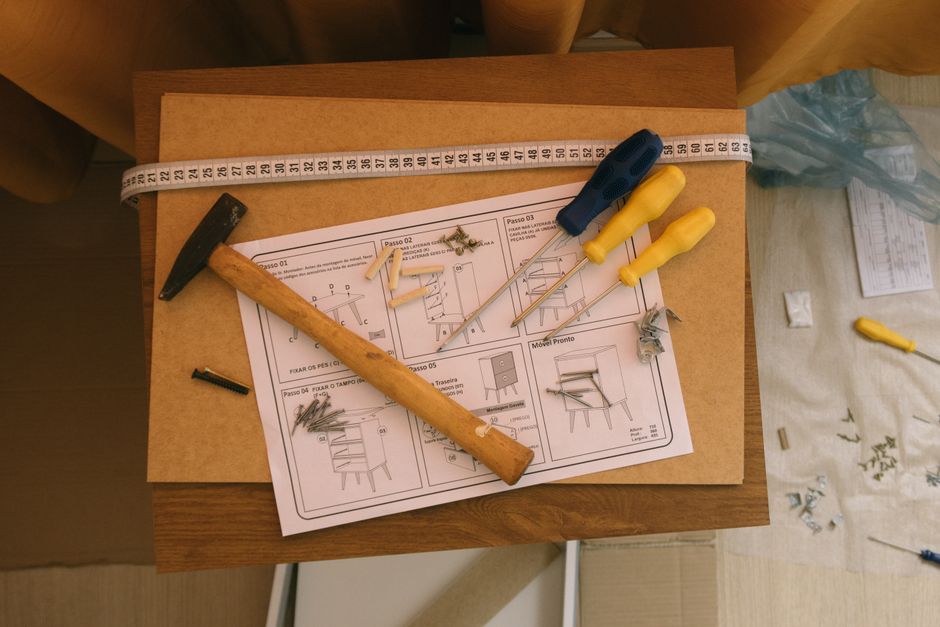
Setting up your Ender 3D printer begins with unboxing and assembling the components. Follow these step-by-step instructions to ensure a smooth assembly process:
- Open the Box: Carefully open the box and remove the contents. Ensure you have all parts, including the frame, print bed, power supply, and extruder assembly.
- Check the Parts List: Refer to the included parts list to confirm all components are present. This includes screws, brackets, and any tools provided.
- Assemble the Frame: Start by assembling the frame. Lay out the two vertical posts and connect them using the horizontal beams. Secure them tightly with the screws provided.
- Attach the Print Bed: Once the frame is stable, attach the print bed. Make sure to align it correctly with the frame and secure it with screws.
- Install the Extruder: Attach the extruder assembly to the frame. Ensure that the extruder is positioned correctly above the print bed for optimal operation.
- Connect the Wiring: Carefully connect the wiring from the power supply to the mainboard and from the extruder to the mainboard, ensuring all connections are secure.
- Final Checks: Inspect all connections and screws to ensure everything is securely fastened, and that there are no loose parts.
Once assembled, you can proceed to install the software necessary for operation.
Software Installation
To operate your Ender 3D printer, you need to install specific software and drivers. Follow these steps for a successful installation:
- Download the Required Software: Visit the official Creality website or a trusted source to download the latest version of slicing software, typically Cura or PrusaSlicer.
- Install the Software: Open the downloaded file and follow the on-screen instructions to install the software on your computer.
- Install Drivers: If your printer requires specific drivers, download them from the manufacturer’s website. Follow the installation instructions provided.
- Configure the Software: Launch the slicing software and configure the settings for the Ender 3. This includes entering the printer’s build dimensions and selecting the correct printer profile.
- Connect the Printer: Use a USB cable to connect your printer to your computer or insert a microSD card into your printer for direct printing.
With the software installed, you can now calibrate your printer for optimal performance.
Calibration and First Print
Calibration is crucial to ensure your Ender 3D printer operates efficiently. Follow these steps for calibration and preparing your first print:
- Level the Print Bed: Start by leveling your print bed. Use the manual leveling method by adjusting the knobs under each corner of the bed until the nozzle is a consistent distance from the bed (typically a piece of paper thickness).
- Set the Nozzle Temperature: Preheat the nozzle to the appropriate temperature for your chosen filament. For PLA, this is usually around 200°C.
- Load Filament: Feed the filament into the extruder. Make sure the filament is properly seated and that you can feel resistance as it is pushed through the nozzle.
- Start the First Print: Use a sample file provided with your slicing software. Save it to the microSD card and insert it into the printer. Select the file from the printer’s interface and start the print.
Once the first print is underway, monitor the initial layers to ensure proper adhesion and quality.
Common Issues and Troubleshooting
Connectivity Problems
Connectivity issues can hinder your printing experience. Here are some common problems and solutions:
- USB Connection Failure: If your printer does not recognize the USB connection, try using a different USB port or cable. Ensure the cable is compatible and not damaged.
- MicroSD Card Issues: If the printer does not read the microSD card, ensure it is properly formatted (FAT32) and that the file is compatible. Try re-saving the file to the card.
- Wi-Fi Connectivity: Ensure your printer is connected to the same Wi-Fi network as your computer. Check the network settings and restart both the printer and router if needed.
By troubleshooting these common connectivity issues, you can ensure seamless operation of your Ender 3D printer.
Print Quality Problems
Print quality can significantly affect the end result. Here are some tips for resolving common print quality issues:
- Stringing: If you notice stringing between prints, try increasing the retraction distance in your slicing software. Adjusting print speed can also help.
- Layer Misalignment: If layers appear misaligned, check the pulley system and belts for tightness. Ensure the printer is on a stable surface and not vibrating during printing.
- Inconsistent Extrusion: If the extrusion is inconsistent, clean the nozzle to remove any clogs. Also, ensure the filament is dry and not absorbing moisture.
By addressing these print quality problems, you can enhance the overall output of your 3D printer.
Paper Jams and Filament Blockages
Dealing with jams and blockages is an inevitable part of 3D printing. Here’s how to handle them effectively:
- Filament Jam: If you encounter a filament jam, turn off the printer and carefully remove the filament. Clean any debris from the nozzle and reinsert the new filament slowly.
- Nozzle Clogs: If the nozzle is clogged, heat it up and use a needle or cleaning filament to clear the blockage. Regular maintenance can prevent future clogs.
- Print Removal Issues: If prints are difficult to remove from the bed, use a spatula to gently pry them off. Consider applying a release agent like glue stick or blue tape to the print bed for easier removal next time.
By following these steps, you can effectively manage jams and blockages, ensuring a smoother printing process.
Maintenance Tips for Ender 3D Printer
Regular Cleaning
Keeping your Ender 3D printer clean is paramount for its longevity and performance. Here’s how to maintain cleanliness:
- Clean the Print Bed: After each print, wipe the print bed with isopropyl alcohol to remove any residue. This helps with adhesion for future prints.
- Dust the Exterior: Regularly dust the exterior of the printer to prevent dust build-up. Use a soft cloth to avoid scratching surfaces.
- Check the Fans and Cooling System: Ensure that the cooling fans are free from dust. Use compressed air to clean them periodically to maintain airflow.
Regular cleaning not only enhances print quality but also extends the lifespan of the printer components.
Firmware Updates
Keeping your printer’s firmware updated is crucial for optimal performance and access to new features. Here’s how to update the firmware:
- Check Current Firmware Version: Navigate to the settings menu on your printer’s LCD to view the current firmware version.
- Download Latest Firmware: Visit the official Creality website to download the latest firmware for the Ender 3.
- Transfer Firmware to MicroSD Card: Save the downloaded firmware file onto a microSD card formatted in FAT32.
- Update the Printer: Insert the microSD card into the printer and navigate to the firmware update option in the settings. Follow the prompts to complete the update.
Regular firmware updates ensure your printer operates with the latest improvements and bug fixes.
Component Inspection
Regular inspection of your printer’s components helps identify worn parts early. Here are some tips:
- Check Belts and Pulleys: Inspect the belts for wear and tension. Replace any frayed belts to maintain print accuracy.
- Examine the Nozzle: Regularly inspect the nozzle for clogs or wear. Consider replacing it if you notice a significant drop in print quality.
- Review Electrical Connections: Periodically check all wiring and connections for any signs of wear or damage. Replace any frayed wires to prevent electrical issues.
By conducting regular inspections, you can prevent potential issues and ensure a smooth printing experience.
Advanced Tips and Tricks
Customizing Your Ender 3D Printer
If you’re looking to take your Ender 3D printer to the next level, customizing it can significantly enhance its performance and capabilities. Here are some popular upgrades and modifications:
- Upgraded Hotend: Replacing the stock hotend with a more efficient one can improve temperature control and reduce clogs. Consider an all-metal hotend for better high-temperature filament compatibility.
- All-Metal Extruder: Upgrading to an all-metal extruder can improve filament feeding, especially for flexible filaments. This will result in more reliable performance.
- Enhanced Cooling Solutions: Adding additional cooling fans or a better cooling duct can help improve layer adhesion and print quality, particularly for overhangs.
- Glass or PEI Print Bed: Upgrading to a glass or PEI print surface can enhance adhesion and make removal of prints easier. Both options provide a smooth surface for better first-layer adhesion.
- Bed Leveling Sensors: Installing an auto bed leveling sensor can significantly simplify the process of achieving a level print bed, which is crucial for successful prints.
These upgrades can make a notable difference in your printing experience and the quality of your outputs. Always remember to research and follow installation instructions carefully to avoid any damage.
Exploring Advanced Printing Techniques
- Dual Extrusion: This technique allows you to print with two different filaments simultaneously, which is great for creating complex models with multiple colors or materials. It requires a dual extrusion setup, so consider upgrading your printer if you want to try this.
- Support Materials: Using soluble support materials can help you print intricate designs without the hassle of removing traditional supports. Materials like PVA (polyvinyl alcohol) dissolve in water, making post-processing much easier.
- Print Orientation: Experimenting with print orientation can significantly impact the strength and appearance of your prints. Adjusting the orientation can help minimize the need for supports and improve overall print quality.
- Temperature and Speed Adjustments: Fine-tuning the temperature and print speed settings for different filaments can lead to better adhesion and surface quality. Always test settings with small prints before committing to larger projects.
By exploring these advanced techniques, you can push the boundaries of what your Ender 3D printer can achieve, opening new avenues for creativity.
Community Resources and Support
- Online Forums: Websites like Reddit, specifically the r/3Dprinting and r/ender3 communities, offer a wealth of knowledge from experienced users. You can find solutions to common problems and share your experiences.
- User Groups: Local user groups or makerspaces often host meet-ups and workshops. Connecting with fellow enthusiasts can provide hands-on learning opportunities and valuable tips.
- YouTube Tutorials: Many users create video tutorials that cover everything from basic setup to advanced modifications. Channels dedicated to 3D printing often feature extensive guides on using and improving your Ender 3.
- Manufacturer Support: Don’t forget to check the official Creality forums and customer support. They offer resources, firmware updates, and troubleshooting assistance specific to the Ender series.
Engaging with these resources can provide ongoing support and inspiration as you navigate the world of 3D printing.
Conclusion
The Ender 3D printer offers an incredible balance of affordability, performance, and customization potential. With the right tips and tricks, you can enhance its capabilities and tackle a wide range of printing projects. Whether you’re just starting or looking to refine your skills, the Ender 3 serves as an excellent foundation for exploration and creativity.
We encourage you to experiment with your Ender 3, embrace the learning process, and don’t hesitate to reach out to the community for assistance. The world of 3D printing is vast and full of possibilities, waiting for you to discover!
FAQ Section
What type of filaments can I use with my Ender 3D printer?
Your Ender 3D printer is compatible with a variety of filaments, including:
- PLA: A great option for beginners due to its ease of use and low printing temperature.
- ABS: Ideal for durable prints, though it requires higher temperatures and a well-ventilated area due to fumes.
- TPU: A flexible filament suitable for items requiring more elasticity, such as phone cases.
- PETG: A strong and durable filament that’s resistant to impact and moisture, making it a good choice for functional parts.
Always check the specifications of the filament and ensure your printer is set to the appropriate temperature settings for optimal results.
How can I improve print adhesion?
Ensuring that your prints adhere well to the print bed is crucial for successful printing. Here are some tips:
- Level the Bed: Regularly check and adjust the bed leveling to ensure a consistent distance between the nozzle and the bed.
- Use Adhesive Aids: Applying glue stick, hairspray, or a specialized adhesive can improve adhesion for various filament types.
- Optimize Bed Temperature: Adjusting the bed temperature according to the filament type can also enhance adhesion. For instance, PLA generally works well at around 50-60°C.
- Clean the Print Bed: Before starting a new print, clean the bed with isopropyl alcohol to remove any oils or residues from previous prints.
Implementing these practices can drastically reduce the chances of prints lifting off during the printing process.
What should I do if my printer won’t turn on?
If your Ender 3D printer won’t turn on, follow these troubleshooting steps:
- Check Power Supply: Ensure the power supply is plugged in and functioning. You can test it with a multimeter to check for output voltage.
- Inspect Cables: Look for any loose or damaged cables connecting the printer to the power supply and ensure they are securely attached.
- Power Switch: Make sure the power switch is in the correct position (usually ‘On’) and try toggling it back and forth.
- Reset the Printer: If the printer has a reset option, try resetting it to see if it will power on again.
If these steps do not resolve the issue, consider reaching out to Creality support or consulting with the community for further assistance.