
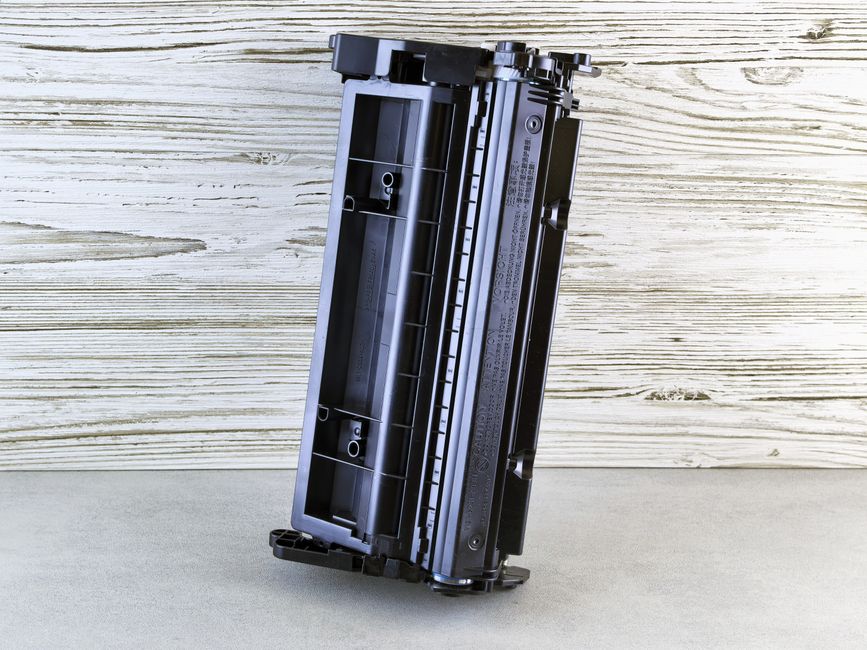
A printer drum, also known as a photoreceptor drum, is a metal cylinder coated with a light-sensitive, photoconductive material that plays a critical role in the laser printing process. It works by receiving an electrostatic charge from a laser beam, which draws a latent image of the document onto the drum’s surface. This charged image then attracts toner powder from the cartridge, transferring it directly onto the paper before the fuser unit melts the toner to create a permanent print. Understanding what is a printer drum is essential for anyone using a laser printer, as it is a consumable part that eventually wears out and must be replaced to maintain crisp, professional document quality.
Depending on the brand of your printer, the drum unit may be built directly into the toner cartridge or sold as a separate, standalone component. For instance, brands like HP and Canon frequently combine the toner and drum into a single cartridge, meaning you replace the drum every time you buy new toner. Conversely, brands like Brother and Lexmark often separate these components, allowing you to replace the toner cartridge multiple times before the drum unit finally reaches the end of its lifespan. Knowing which system your printer uses can save you significant maintenance costs over the lifetime of your machine.
To keep your office equipment running efficiently, it is helpful to understand how the drum interacts with the rest of your printer’s hardware. When issues arise, they can range from simple software communication errors to physical hardware wear on the drum surface. In the following sections, we will explore common printer issues, safe troubleshooting techniques, and how to determine when it is time to replace your hardware.
Common Printer Issues & Quick Fixes
Laser printers are highly complex machines that rely on the perfect synchronization of electrical charges, mechanical gears, and software commands. When one part of this system fails, it can disrupt your entire workflow and leave you with unfinished tasks. Fortunately, many of the most common printing problems can be resolved quickly at home or in the office without calling a professional technician.
By understanding the relationship between your computer, the printer driver, and the physical print engine, you can systematically isolate and fix issues. Whether your machine refuses to connect to your network or is producing smudged pages, a methodical approach to troubleshooting will get you back online. Let us examine the most common issues users face and the quick fixes you can apply today.
Printer Offline or Not Connecting
One of the most frustrating issues a user can encounter is when a printer suddenly refuses to communicate with the computer. If you find yourself asking why is my printer offline, the problem is almost always rooted in network connectivity or driver communication rather than a physical hardware failure like a worn-out drum. To resolve this, start by checking the physical connections, ensuring the USB or Ethernet cables are firmly plugged into both devices.
If you are using a wireless connection, verify that both your computer and the printer are connected to the exact same Wi-Fi network band. Routers often split signals into 2.4GHz and 5GHz bands, and if your devices are on different bands, they may fail to see each other. Restarting your router, computer, and printer can also clear temporary IP address conflicts that cause offline status errors.
On Windows systems, you can also check the print queue status to ensure the printer is not set to offline mode. Navigate to your Control Panel, open “Devices and Printers,” right-click your printer, and select “See what’s printing.” Click the “Printer” menu at the top of the window and ensure that “Use Printer Offline” is unchecked. Restarting the Windows Print Spooler service via the Services application is another quick fix that often restores communication instantly.
How to Clear Paper Jams Safely
Paper jams are an inevitable part of printer ownership, but clearing them incorrectly can cause permanent damage to sensitive internal components. The printer drum is particularly vulnerable during a jam, as its delicate photoconductive coating can be easily scratched or contaminated. If you scratch the drum surface while removing stuck paper, that scratch will leave a permanent mark on every single page you print thereafter.
To clear a jam safely, always turn off the printer and unplug it from the wall outlet to prevent electrical shocks and allow the hot fuser unit to cool down. Open the main access doors and locate the paper path, taking note of where the paper has buckled or caught. Carefully grasp the stuck paper with both hands and pull it slowly in the direction of the normal paper path to avoid tearing the sheet.
If the paper is lodged directly beneath the drum unit, remove the entire drum and toner assembly from the printer first. Never use force to yank the paper out, and never use sharp objects like scissors or tweezers to pry paper loose, as these will easily gouge the drum surface. Once the paper is cleared, gently wipe away any loose toner dust with a dry, lint-free microfiber cloth before reinserting the cartridge assembly.
Fixing Poor Print Quality (Fading, Streaks)
Poor print quality is often the first warning sign that your printer drum is wearing out or has been damaged. When a drum reaches the end of its life, its photoconductive coating loses the ability to hold an electrical charge, resulting in faded prints, gray backgrounds, or light patches. However, before replacing the drum, verify that your toner cartridge is not simply running low on powder by removing it and gently rocking it side-to-side to redistribute the contents.
Vertical lines or streaks down the page are another common print quality issue, often caused by a scratched drum or a dirty corona wire. Many separate drum units, such as those made by Brother, feature a built-in corona wire cleaner, which is a small plastic slider on the drum housing. Sliding this tab back and forth a few times clears away dust and loose toner, which often resolves thin vertical streaks instantly.

If you notice repeating spots or marks at regular intervals down the page, this is a classic symptom of a damaged drum cylinder. Because the drum is a cylinder that rotates as the paper passes through, any physical dent or speck of stuck toner on its surface will leave a mark every time the drum completes a rotation. You can consult your printer’s manual to find a “defect ruler” chart, which helps identify if the distance between repeating marks matches the circumference of the drum.
Advanced Troubleshooting
When basic troubleshooting steps fail to resolve printing errors, you may need to look deeper into the system software or hardware calibration. Advanced issues often present themselves as persistent error messages, incorrect page formatting, or a printer that refuses to recognize new hardware components. Resolving these issues requires a systematic approach to updating the software that governs how your computer communicates with the printer hardware.
It is also common for printers to require manual calibration or counter resets after you install a new drum unit. Because printers cannot physically detect the wear on a drum, they rely on page counters to estimate when the drum needs replacement. Understanding how to manage these settings and update your software will help you resolve complex errors and extend the life of your office equipment.
Driver Updates & Reinstallation
Printer drivers are the translator programs that allow your computer’s operating system to communicate with your printer hardware. Over time, these drivers can become corrupted due to operating system updates, software conflicts, or malware, leading to communication failures and false hardware errors. If your printer is displaying incorrect drum errors or printing gibberish, reinstalling the driver is often the best course of action.
To perform a clean driver installation, first go to the printer manufacturer’s official website and download the latest driver package for your specific printer model. Next, uninstall the existing printer software from your computer’s settings menu and remove the printer from your device list. Restart your computer to ensure all temporary driver files are completely cleared from the system memory.
Once your computer restarts, run the downloaded installation package and follow the on-screen prompts to connect your printer. If you are using a network printer, the installation software will search your local network to assign the correct IP address port. Using the official manufacturer’s driver rather than generic operating system drivers ensures you have access to all maintenance utilities, including drum life monitors and print density adjustments.
When to Call Support vs. Buy New
As printers age, the cost of maintenance and replacement parts can quickly add up, leaving users to decide whether to repair their current machine or invest in a new one. The decision often comes down to the cost of the consumable parts relative to the price of a brand-new printer. Because separate drum units can be expensive, you must calculate the total cost of ownership before purchasing replacement parts.

If you own an inexpensive, entry-level laser printer, a replacement drum unit can sometimes cost almost as much as a new printer that comes bundled with starter cartridges. In this scenario, purchasing a new printer may be more economical, especially if the new model offers updated features like faster print speeds or better wireless connectivity. However, for high-end office printers or multifunction machines, replacing the drum is a routine maintenance step that is far cheaper than replacing the entire unit.
You should also consider calling professional support if your printer is experiencing mechanical failures, such as grinding gears, broken paper feed rollers, or fuser errors. These internal hardware components are difficult to service without specialized training and tools. If your printer prints perfectly but simply cannot connect to your computer network after trying all driver troubleshooting steps, reaching out to your IT support desk or the manufacturer’s technical support line can help resolve deep-seated network configuration issues.
Frequently Asked Questions
What is the difference between a toner cartridge and a drum unit?
The toner cartridge is the container that holds the actual colored or black plastic powder (toner) used to create the text and images on the page. The drum unit is the electrical cylinder that receives the laser image, attracts the toner powder from the cartridge, and transfers it onto the paper. In short, the toner is the ink, and the drum is the transfer mechanism that applies it.
How long does a printer drum last?
A printer drum typically lasts much longer than an individual toner cartridge, usually requiring replacement after every three to four toner changes. On average, a standard office printer drum unit is rated to print between 12,000 and 50,000 pages before it wears out, depending on the manufacturer and model. Most modern printers will display a “Replace Drum” warning message on their screen when the page counter reaches this limit.
Can I clean a scratched printer drum?
No, you cannot clean or repair a physically scratched printer drum. The green or blue photoconductive coating on the drum is incredibly sensitive, and any physical scratch removes this coating permanently, preventing that spot from holding an electrical charge. If your drum has a physical scratch, the only solution is to replace the drum unit to restore clean print quality.
Why does my printer say “Replace Drum” after I just installed a new one?
This issue occurs because most printers do not automatically detect when a new drum unit has been installed. Instead, they rely on a manual page counter that must be manually reset by the user through a specific sequence of button presses on the printer’s control panel. You will need to consult your printer’s user manual to find the exact button combination required to reset the drum life counter for your specific model.
Disclaimer: Always refer to the specific manufacturer’s manual (HP, Canon, Epson, Brother) before performing hardware maintenance. Ensure the printer is powered off and unplugged when handling internal components to avoid electrical shock or burns from hot fusers.