
Understanding Why Your Printer is Streaking
Few things are more frustrating than printing a critical document only to find it marred by unsightly lines, faded bands, or messy smudges. Whether you are preparing a business proposal or printing family photos, learning how to fix printer streaks is an essential DIY skill that can save you time and money. Fortunately, you do not need to call a professional technician right away. Most streaking issues can be resolved at home with a few simple tools, a bit of patience, and the right troubleshooting steps. This comprehensive guide will walk you through the diagnostic steps, cleaning procedures, and alignment processes to restore your print quality. With an estimated time of 30 to 60 minutes and a difficulty level ranging from Easy to Medium, you can easily get your machine back to peak performance.

Before diving into the physical cleaning process, it is crucial to understand the root cause of the issue. The method you use to resolve the problem depends heavily on whether you own an inkjet or a laser printer. These two technologies operate on completely different physical principles, meaning that a solution for one will not work for the other. Let’s look at the mechanics behind how to fix printer streaks for both printer types so you can accurately diagnose your machine.
Common Causes of Inkjet Printer Streaks
Inkjet printers rely on liquid ink, which is sprayed through hundreds of microscopic nozzles on a printhead. These nozzles are incredibly delicate, often thinner than a human hair. When you understand how these systems work, it becomes much easier to identify why streaks occur. Here are the primary reasons your inkjet printer might be producing streaked pages:
- Clogged Nozzles: If your printer sits idle for several weeks, the liquid ink at the tip of the nozzles evaporates, leaving behind a crust of dried ink. This crust blocks the flow of fresh ink, resulting in missing lines or faint horizontal streaks across your prints.
- Air Bubbles in the Ink Lines: During cartridge replacement or normal operation, tiny pockets of air can get trapped in the printhead carriage. These bubbles prevent the ink from reaching the paper consistently, causing sudden gaps in the printed text or images.
- Dirty Printhead Exterior: Over time, dust, paper fibers, and excess ink accumulate on the underside of the printhead. As the carriage moves back and forth, this debris drags across the page, creating unsightly ink smudges and dark streaks.
To determine if you are dealing with ink smudges or clogged nozzles, look closely at the pattern. Clogged nozzles typically produce clean, horizontal white lines where ink is missing. On the other hand, ink smudges appear as dark, smeared tracks of wet or dried ink that drag along the direction of the paper feed.
Common Causes of Laser Printer Streaks
Laser printers do not use liquid ink; instead, they use dry toner powder, static electricity, and a laser to melt plastic particles onto the paper via a fuser unit. Because the technology is dry, the causes of streaks are entirely different from those of inkjet printers. If you are trying to figure out how to fix printer streaks on a laser printer, you are likely dealing with one of the following mechanical issues:
- Dirty Corona Wires: The corona wire is responsible for applying an electrostatic charge to the drum unit. If toner dust or paper fibers settle on this wire, it cannot charge the drum evenly. This results in thin, vertical white lines running down the entire length of the page.
- Scratched or Damaged Drum: The photosensitive drum is highly sensitive. If it gets scratched by a piece of debris or during cartridge installation, the damaged area will either attract too much toner or none at all. This creates permanent, repeating toner lines or black spots at regular intervals.
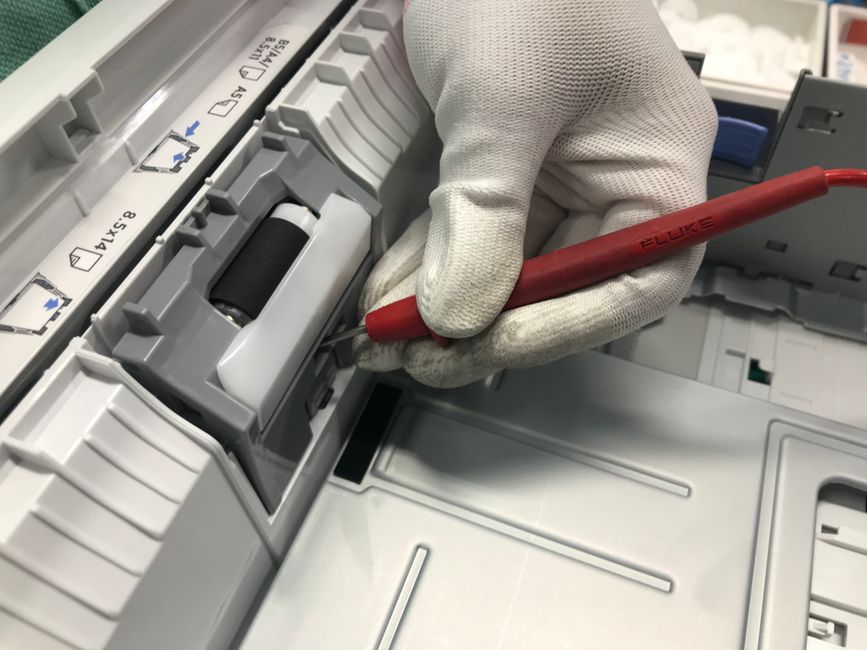
- Contaminated Rollers: The transfer rollers and fuser rollers pull the paper through the machine. If toner melts onto these rollers, it will transfer back onto subsequent pages, leaving repeating smudges or ghost images.
Differentiating between ink smudges and toner lines is simple: toner lines are dry, powdery, and often run vertically down the page in a highly consistent pattern. Ink smudges are wet or smeared, while toner lines are bonded to the paper fibers and cannot be easily wiped away once they pass through the fuser.
—
What You’ll Need
Before you begin the cleaning process, gathering the correct tools is essential. Using the wrong cleaning materials can permanently damage the sensitive internal components of your printer. For example, using harsh household chemicals or rough paper towels can ruin a printhead or scratch a laser drum beyond repair. Set up a clean, well-lit workspace and prepare the supplies listed below.
Basic Cleaning Supplies
Having the right cleaning agents ensures that you remove debris without leaving residue behind. Keep these items on hand for both inkjet and laser printer maintenance:
- Isopropyl Alcohol (99%): It is critical to use 99% isopropyl alcohol. Lower concentrations (like 70% rubbing alcohol) contain too much water, which dries slowly and can cause electrical short circuits. Isopropyl alcohol dissolves dried ink and grease quickly and evaporates almost instantly.
- Distilled Water: When cleaning inkjet printheads, always use distilled water. Tap water contains minerals, calcium, and chlorine that will clog the microscopic nozzles permanently once the water evaporates. Distilled water is completely pure and safe for delicate components.
- Lint-Free Microfiber Cloths: Standard paper towels or tissues shed tiny fibers that can clog printhead nozzles or scratch optical components. Microfiber cloths designed for electronics are soft, non-abrasive, and leave no lint behind.
- Cotton Swabs: These are perfect for reaching tight corners, cleaning individual nozzle plates, and wiping down corona wires. Ensure they are tightly wound so they do not shed cotton fibers.
Safety and Protective Gear
Printer maintenance can be messy, and some components present safety hazards. Protect yourself and your workspace by using the following gear:
- Latex or Nitrile Gloves: Printer ink stains skin easily and can take days to wash off. Toner powder is extremely fine and can get embedded under your fingernails. Wearing gloves keeps your hands clean and prevents skin irritation from isopropyl alcohol.
- Dust Mask: If you are cleaning a laser printer, wearing a simple dust mask is highly recommended. Toner particles are microscopic and can easily become airborne, causing respiratory irritation if inhaled.
- Safety Glasses: While rare, cleaning pressurized ink cartridges or spraying compressed air can cause tiny droplets of ink or solvent to splash. Safety glasses protect your eyes from accidental splashes.
Safety Warning: Laser printers operate at extremely high temperatures. The fuser unit, which melts the toner onto the paper, can reach temperatures over 400°F (200°C). Always turn off the printer, unplug it from the wall, and let it cool down for at least 30 minutes before touching any internal metal parts.
Replacement Parts (If Necessary)
Sometimes, cleaning alone is not enough to resolve the issue. If components are physically worn out, you may need to source replacement parts. Keep your printer’s exact model number handy. Depending on your diagnosis, you may need to order a new printhead assembly (for inkjet printers) or a new drum unit, fuser kit, or waste toner box (for laser printers). Always opt for original equipment manufacturer (OEM) parts to ensure compatibility and print quality.
—
Step-by-Step Instructions
Now that you understand the mechanics and have gathered your supplies, it is time to tackle the cleaning process. Follow these step-by-step instructions carefully to resolve your printing issues. We will start with the easiest diagnostic steps before moving on to manual cleaning methods.
Step 1: Run a Printer Test Page
The first step in learning how to fix printer streaks is to identify exactly which cartridge, color channel, or mechanical component is causing the issue. Printing a standard document wastes ink and rarely provides the diagnostic data you need. Instead, you should print a targeted test sheet designed to display every color channel individually.
To begin, navigate to this resource to download a high-quality printer test page. Load standard white paper into your printer tray and print the document using your printer’s highest quality setting.
Once printed, examine the test page closely. Look at the solid color blocks (cyan, magenta, yellow, and black). If the cyan block has horizontal white lines running through it, but the other colors are solid, you have isolated the clog to the cyan nozzle. If you see repeating black spots at exact intervals down the page, you can measure the distance between the spots to determine which roller in your laser printer is damaged.
Step 2: Use the Built-In Automated Cleaning Cycle
Modern printers feature built-in maintenance routines designed to clear minor clogs without requiring you to open the machine. These cycles pump a small amount of ink through the nozzles to flush out dried residue. Here is how to access this utility on different operating systems:
On Windows:
- Open the Control Panel and select Devices and Printers.
- Right-click on your active printer and select Printing Preferences or Printer Properties.
- Navigate to the Maintenance, Utility, or Tools tab.
- Click on Head Cleaning, Nozzle Clean, or Deep Cleaning.
- Follow the on-screen instructions and print a nozzle check pattern when prompted.
On macOS:
- Click the Apple menu and open System Settings (or System Preferences).
- Select Printers & Scanners and click on your printer.
- Click on Options & Supplies, then select the Utility tab.
- Click Open Printer Utility.
- Select Clean Printheads or Nozzle Clean and let the process run.
Caution: Automated cleaning cycles consume a significant amount of ink. Do not run this cycle more than two or three times in a row. Doing so can saturate the waste ink absorber pad inside your printer, leading to internal leaks and error messages.
Step 3: Manually Clean the Printhead (Inkjet)
If the automated cleaning cycle does not resolve the streaks, you will need to manually clean the printhead. This process involves removing dried ink build-up directly from the nozzle plate. Follow these steps carefully:
- Turn off the printer, unplug it from the power source, and open the main access door.
- Remove the ink cartridges and set them upright on a sheet of plastic or paper towels to prevent staining your desk.
- Determine your printhead type. If your cartridges have a copper strip with a small metal plate on the bottom, the printhead is integrated into the cartridge. If the cartridges insert into a plastic cradle inside the printer, the printhead is built into the carriage.
- For integrated cartridges: Dampen a lint-free microfiber cloth with warm distilled water. Gently press the copper nozzle plate on the bottom of the cartridge against the damp cloth. Hold it there for 10 seconds. Do not scrub, as this can damage the nozzles. You should see a clean strip of ink transfer to the cloth. Blot the nozzle plate dry with a dry section of the cloth.
- For carriage-based printheads: If the printhead assembly is removable, lift the locking lever and pull it out. Soak the bottom of the printhead in a shallow dish filled with a mixture of warm distilled water and 99% isopropyl alcohol (50/50 ratio) for 10 minutes. If it is not removable, place a folded, damp microfiber cloth soaked in warm distilled water directly under the printhead carriage path. Manually slide the carriage over the cloth and let it sit for 15 minutes to dissolve the dried ink.
- Reinstall the components, plug the printer back in, and run a test print.
Step 4: Clean the Corona Wire and Drum (Laser)
If you are working with a laser printer, manual cleaning involves clearing toner dust from the electrostatic components. Ensure the printer has cooled down completely before starting this step.
- Open the front or side cover of the laser printer and carefully remove the toner cartridge and drum assembly.
- Locate the corona wire. This is a thin wire running parallel to the drum unit, often protected by a plastic grid.
- Look for a small, brightly colored (usually green or yellow) slider tab on the drum unit. This is the built-in corona wire cleaner.
- Gently slide this tab back and forth along the length of the wire four to five times. This action scrapes away accumulated toner dust and paper fibers.
- Crucial Step: Return the slider tab to its original starting position. There is usually a small arrow indicating the home position. If you fail to return the tab to its home position, you will get a thick, solid black streak down the middle of every page you print.
- Inspect the photosensitive drum. If you see spots of toner stuck to the green or blue cylinder, gently wipe them off using a dry, lint-free microfiber cloth. Do not use alcohol, water, or harsh chemicals on the drum, as they can strip the photosensitive coating.
- Reinsert the assembly, close the cover, and run a test print.
Step 5: Perform a Printhead Alignment
Sometimes, streaks are not caused by dirt or clogs, but by physical misalignment of the printheads. This is especially common after installing new cartridges or moving the printer. Misalignment causes the printer to spray ink slightly off-target, resulting in jagged lines, blurry text, or overlapping color bands.
- Access your printer utility software using the steps outlined in Step 2.
- Select the option labeled Printhead Alignment, Align Cartridges, or Calibration.
- The printer will print an alignment sheet containing numbered patterns of vertical and horizontal lines.
- Examine the patterns closely. Identify which pattern in each set is the straightest and has the fewest visible gaps or overlaps.
- Enter the corresponding numbers into the software interface to calibrate the printhead sensors.
- Print a final test page to verify that the streaks have been resolved.
Deep Dive: Cleaning Inkjet Printheads
When learning how to fix printer streaks, understanding the anatomy of your inkjet printhead is half the battle. The printhead is the component responsible for spraying microscopic droplets of ink onto the page. Over time, tiny remnants of ink dry up at the nozzle openings, blocking the flow and causing those frustrating lines on your documents. Depending on the brand and model of your printer, your printhead will either be integrated into the ink cartridge itself or built directly into the printer carriage assembly.
Before you begin any manual cleaning procedure, ensure you have the correct supplies ready. You will need distilled water (tap water contains minerals that can clog the nozzles further), 99% isopropyl alcohol, lint-free microfiber cloths, a shallow glass or plastic dish, and a pair of nitrile gloves. Working in a well-lit area with a flat surface covered in paper towels will help protect your workspace from accidental ink spills.
Cleaning Integrated Cartridge Printheads
Integrated printheads are commonly found on budget-friendly printers, particularly those manufactured by HP and Canon. In this design, the printhead is built directly onto the bottom of the disposable ink cartridge. The primary advantage of this system is that if the printhead becomes permanently damaged or clogged, you can simply replace the cartridge to get a brand-new printhead. However, these cartridges are more expensive to replace, making manual cleaning a highly cost-effective skill to learn.
To clean an integrated cartridge printhead, start by turning on your printer and opening the access door. Wait for the carriage to slide to the center, then gently remove the problematic cartridge. Locate the copper strip on the back of the cartridge and the metal nozzle plate on the bottom. Warning: Never touch the copper electrical contacts or the nozzle plate with your bare hands. The natural oils and static electricity from your fingers can permanently damage the electronics or transfer skin oils that block the ink flow.
- Dampen a clean, lint-free microfiber cloth with warm distilled water. Ensure it is damp, not dripping wet.
- Gently press the bottom nozzle plate of the cartridge against the damp cloth. Hold it in place for approximately 10 to 15 seconds.
- Look at the cloth; you should see a clear, solid strip of ink transfer from the cartridge. If the ink appears blotchy or incomplete, move to a clean spot on the cloth and repeat the process.
- Use a dry section of the microfiber cloth to gently blot the nozzle plate dry. Do not scrub or rub the plate, as this can scratch the delicate microscopic nozzles.
- Reinsert the cartridge into the printer, close the access door, and run a test print to see if the streaks have cleared.
Cleaning Removable Printheads
Many mid-range and high-end inkjet printers, particularly those from Epson, Brother, and some Canon models, use a separate, removable printhead. In this configuration, the ink cartridges act merely as ink reservoirs that snap into a larger plastic carriage. The carriage houses the actual printhead unit, which remains in the printer when you change cartridges. While this makes individual ink cartridges cheaper to purchase, a clogged printhead can be more challenging to resolve.
To clean a removable printhead, you must first remove all the individual ink cartridges from the carriage. Once the cartridges are removed, look for a plastic lever or latch on the side of the carriage assembly. Lifting this lever releases the printhead unit, allowing you to lift it completely out of the printer. Handle this unit with extreme care, as it contains sensitive electronic circuitry.
- Prepare a clean workspace and put on your nitrile gloves to protect your skin from ink stains.
- Inspect the bottom of the printhead unit. You will see several circular ink intake ports that connect to the cartridges, and the nozzle plate on the bottom.
- Dampen a lint-free cloth with warm distilled water and gently wipe away any accumulated ink paste or paper dust from the plastic housing surrounding the nozzles.
- If you notice stubborn buildup on the intake ports, use a cotton swab lightly moistened with distilled water to clean around the rims of the ports.
- Carefully lower the printhead back into the carriage, lock the lever in place, reinsert the ink cartridges, and run the printer’s built-in nozzle check utility.
Soaking Stubborn Clogs
If standard cleaning cycles and basic manual wiping fail to resolve your print quality issues, you are likely dealing with a severely dried, stubborn ink clog. In this scenario, soaking the printhead is the most effective DIY solution. This process requires patience, as it can take anywhere from a few hours to overnight to fully dissolve the hardened ink deposits inside the microscopic channels.
To perform a deep soak, you will need to mix a cleaning solution consisting of 50% warm distilled water and 50% 99% isopropyl alcohol. The alcohol acts as a solvent to break down the binder chemicals in the ink, while the warm water helps dissolve the pigment particles. Place a shallow glass dish on your workspace and pour in just enough of the mixture to cover the bottom—aim for a depth of about 1/8 inch (approximately 3 millimeters).
- Remove the printhead assembly from the printer as described in the previous section.
- Gently lower the printhead into the shallow dish so that only the bottom nozzle plate is submerged in the liquid. Crucial Warning: Do not submerge the entire printhead. The copper electrical contacts on the back and sides must remain completely dry to prevent short-circuiting the electronics.
- Let the printhead soak in the solution for 30 to 60 minutes. For severe clogs, you can leave it to soak overnight. You will see the cleaning liquid turn dark as the dried ink begins to dissolve and bleed out of the nozzles.
- Remove the printhead from the dish and place it on a clean, dry microfiber cloth. Let it air dry completely for at least two hours before reinstalling it. Any residual moisture on the electrical contacts can ruin the printer when powered on.
- Once dry, reinstall the printhead, insert the cartridges, and run two consecutive printhead cleaning cycles to prime the nozzles with fresh ink.
Deep Dive: Fixing Laser Printer Streaks
If you are troubleshooting a laser printer, the process of how to fix printer streaks is entirely different from an inkjet. Laser printers do not use liquid ink; instead, they use a fine, plastic-based powder called toner. This powder is transferred to the page using static electricity and then melted onto the paper using heat and pressure. Consequently, streaks in laser prints are usually caused by dirty rollers, physical damage to the imaging components, or loose toner dust inside the chassis.
Working inside a laser printer requires specific safety precautions. The internal components operate under high voltage and extreme heat. Always turn off the printer, unplug it from the wall outlet, and allow it to cool down for at least 30 minutes before opening any access panels. Additionally, toner dust is incredibly fine and can easily become airborne, so work in a well-ventilated area and avoid breathing in the dust.
Cleaning the Transfer Roller
The transfer roller is a soft, black rubber or foam roller located directly beneath the toner cartridge and drum assembly. Its primary job is to apply an electrostatic charge to the back of the paper, pulling the toner particles off the photosensitive drum and onto the page. If the transfer roller becomes coated in paper dust, lint, or stray toner, it cannot apply an even charge, resulting in light, faded, or vertical streaks down your prints.
To clean the transfer roller, locate it inside the printer cavity after removing the toner cartridge. It looks like a long, dark foam cylinder. Crucial Warning: Never touch the surface of the transfer roller with your bare fingers. The natural oils on your skin will permanently damage the foam, preventing it from holding an electrostatic charge and causing permanent print defects. Always wear clean gloves or use a dry, lint-free microfiber cloth to handle it.
- Locate the transfer roller inside the bottom of the printer chassis. Do not remove it unless your printer manual specifically instructs you to do so.
- Take a dry, lint-free microfiber cloth and gently wipe the surface of the roller from one end to the other. Rotate the roller slowly using the plastic gears at the ends to clean the entire circumference.
- Do not use water, alcohol, or any liquid cleaners on the transfer roller. Moisture can degrade the electrostatic properties of the foam and ruin the component.
- If there are stubborn toner clumps on the roller, use a dry, clean cotton swab to gently brush them away.
- Reinstall the toner cartridge, close the printer cover, plug the machine back in, and print a test page to check the quality.
Inspecting the OPC Drum for Scratches
The Organic Photo Conductor (OPC) drum is the heart of the laser printing process. It is a metal cylinder coated with a light-sensitive, green or blue chemical layer. The printer’s laser draws your image onto this drum, creating an electrostatic template that attracts the toner. Because the drum is highly sensitive, any physical scratch, ding, or fingerprint on its surface will permanently alter its ability to hold a charge. This results in repetitive horizontal or vertical streaks that appear at identical intervals down the page.
To determine if your OPC drum is damaged, you can use the “repetitive defect” calculation. Because the drum is a cylinder, a scratch on its surface will touch the paper once per rotation. Measure the distance between the repeating streaks on your printed page. If the distance matches the circumference of the drum (usually about 2 to 3 inches depending on the model), the drum is the culprit. You must inspect the drum visually to confirm this diagnosis.
- Remove the toner cartridge or separate drum unit from the printer. In many modern printers, the drum is integrated directly into the toner cartridge; in others, it is a separate tray.
- Locate the drum shutter—a spring-loaded plastic cover on the cartridge that protects the green or blue cylinder. Gently pull this shutter back to expose the drum.
- Slowly rotate the drum by turning the plastic drive gear on the side of the cartridge. Inspect the surface under a bright light for scratches, pinholes, or stuck toner.
- If you see a physical scratch or gouge in the green coating, the drum cannot be repaired. You must replace the drum unit (or the entire toner cartridge if the drum is integrated) to resolve the streaks.
- If you only see a smudge of loose toner or paper dust on the drum, gently wipe it away using a dry, clean microfiber cloth. Never use alcohol or solvents, as they will strip the photosensitive coating.
Dealing with Excess Toner Spills
Toner spills inside a laser printer are a common cause of messy, erratic streaks. These spills can happen if a cartridge leaks, if a cheap third-party cartridge cracks, or if paper jams tear inside the machine. Because toner is a fine plastic powder, cleaning it up requires specific techniques to avoid damaging the printer or creating a safety hazard. The fuser unit, which melts the toner, operates at temperatures exceeding 300°F (150°C), so absolute caution is required.
Safety Warning: Never use a standard household vacuum cleaner to clean up loose toner dust. Toner particles are electrostatic and extremely fine. Passing through a standard vacuum can generate static electricity, leading to a spark that can ignite the dust cloud inside the vacuum, causing a fire or minor explosion. Furthermore, standard vacuum filters cannot trap toner, meaning the vacuum will blow the toxic dust out into your room. Instead, use a specialized static-safe toner vacuum or clean it manually using the method below.
- Turn off the printer, unplug it, and allow it to cool down completely to prevent burns from the fuser.
- Put on a dust mask and nitrile gloves to avoid inhaling the fine particles or staining your hands.
- For large piles of spilled toner, use a piece of stiff cardstock or heavy paper to scoop the loose powder out of the printer and discard it in a trash bag.
- To clean the remaining dust from the interior surfaces, take a clean microfiber cloth and dampen it slightly with cold water. Important: Do not use warm or hot water. Heat will melt the toner, causing it to permanently bond to the cloth, the printer chassis, or your clothes.
- Gently wipe down the dusty areas inside the printer, changing to clean sections of the damp cloth frequently. Once finished, let the interior dry completely before reinstalling the cartridges and powering on the machine.
Tips for Best Results
Learning how to fix printer streaks is an excellent troubleshooting skill, but preventing them from occurring in the first place will save you time, money, and frustration. Most print quality issues stem from simple maintenance neglect or using incompatible materials. By implementing a few proactive habits into your printing routine, you can ensure clean, crisp documents every time you press print.
Maintaining your printer does not require hours of complex labor. Rather, it involves making informed decisions about the media you feed into the machine and establishing a consistent usage schedule. Below are the key practices that will keep both inkjet and laser printers running at peak performance.
Select the Right Paper Quality
Many users do not realize that the paper they choose has a direct impact on the internal health of their printer. Cheap, low-grade copy paper is often poorly cut and contains loose, dusty fibers. As this paper feeds through the printer, it sheds these fibers. In inkjet printers, this paper dust mixes with wet ink to form a thick paste that clogs the microscopic nozzles. In laser printers, the dust coats the transfer roller and OPC drum, disrupting the electrostatic charges needed to transfer toner cleanly.
Additionally, paper is highly hygroscopic, meaning it absorbs moisture from the surrounding air. If you store your paper in a damp basement or a humid room, the sheets will hold water. When printed on, damp paper causes inkjet ink to feather and bleed, creating fuzzy text and horizontal streaks. In laser printers, the moisture prevents the toner from fusing correctly, resulting in smudged prints and paper jams. Always store your paper in a cool, dry place in its original sealed packaging, and choose high-quality, smooth-finish paper designed for your specific printer type.
Use the Printer Regularly to Prevent Clogging
If you own an inkjet printer, inactivity is your worst enemy. Inkjet inks are liquid suspensions containing pigments, dyes, and solvents. When the printer sits idle for weeks at a time, the liquid solvent in the printhead nozzles evaporates, leaving behind solid pigment crusts. This drying process happens quickly, often within just ten to fourteen days of non-use. Once the nozzles are crusted over, the printer will produce faded lines, missing colors, or severe streaks.
To keep the ink flowing smoothly, make a habit of printing at least one color document or test page once a week. This regular use forces fresh ink through the nozzles, preventing the ink from drying out and keeping the internal channels primed. If you plan to go on vacation or leave the printer unused for an extended period, perform a manual printhead cleaning cycle before you leave, and ensure the printer is turned off using its physical power button. Turning the printer off correctly allows the carriage to park the printhead on a rubber sealing cap, protecting the nozzles from air exposure.
Store Cartridges Correctly
Proper storage of spare ink and toner cartridges is crucial for maintaining print quality. Spare cartridges should always be stored in an upright position, in their original sealed foil packaging, and in a temperature-controlled environment. Exposing cartridges to extreme heat (such as in a hot car or near a radiator) can cause ink to expand and leak, or toner powder to clump and harden inside the cartridge shell. Conversely, freezing temperatures can cause liquid ink to separate, ruining its viscosity.
Furthermore, keep your printer’s firmware updated. Manufacturers regularly release firmware updates that optimize the automated cleaning cycles and adjust printhead voltages to prevent premature clogging. Finally, always use original equipment manufacturer (OEM) cartridges or high-quality, reputable third-party replacements. Bargain-basement cartridges often use low-grade inks with incorrect viscosity or toner with inconsistent melting points, both of which are leading causes of persistent printer streaks.
Troubleshooting
Even after executing standard maintenance protocols, you may still encounter issues when trying to resolve print quality defects. Understanding how to fix printer streaks requires a systematic approach to diagnosis, especially when basic cleaning cycles fail to deliver clean pages. When streaks, bands, or smudges persist, the root cause usually transitions from simple dirt or dust to hardware degradation, firmware errors, or connectivity disruptions.
This troubleshooting guide is designed to help you isolate persistent hardware failures and manage the software and network glitches that frequently interrupt the repair process. By following these step-by-step diagnostic procedures, you can pinpoint the exact component causing the issue and determine whether a quick fix, a replacement part, or professional service is required.
Streaks Persist After Multiple Cleanings
If you have run three or more consecutive printhead cleaning cycles on your inkjet printer and the nozzle check pattern still shows gaps or streaks, running further automated cleanings will not help. In fact, excessive cleaning cycles consume large amounts of ink and can flood the waste ink pad, potentially causing internal leaks. At this stage, the ink has either dried completely inside the printhead micro-channels, or the printhead itself has suffered electrical failure.
To resolve persistent streaks in inkjet printers when software utilities fail, follow this manual diagnostic and cleaning process:
- Verify Ink Levels and Expiration Dates: Confirm that your cartridges actually contain ink. Sometimes, a faulty sensor reports a cartridge is full when it is dry. Additionally, check the expiration date stamped on the cartridge. Old ink loses its viscosity, leading to persistent streaks that no amount of cleaning can resolve.
- Perform a Manual Printhead Soak (For Removable Printheads): If your printer uses a removable printhead assembly, turn off the machine, unplug it, and remove the ink cartridges. Carefully release the latch holding the printhead assembly and lift it out. Place the printhead in a shallow container filled with warm, distilled water (do not use tap water, as its mineral content can clog the nozzles). Let it soak for 10 to 15 minutes to dissolve stubborn ink plugs. Dry the electrical contacts thoroughly with a lint-free microfiber cloth before reinstalling.
- Replace the Affected Cartridge: If your printer uses integrated cartridges (where the printhead is built directly into the bottom of the disposable ink tank), the solution is simple: replace the cartridge. A fresh cartridge will give you a brand-new printhead, immediately resolving any streaks caused by physical nozzle damage.
For laser printers, persistent streaks after cleaning indicate physical wear on the imaging components. If you notice vertical lines that do not fade, try the following steps:
- Perform a Stop Test (Half-Way Test): Start printing a page containing the streaks. As soon as the paper is halfway through the printing process (before it reaches the fuser unit), open the printer cover or pull the power plug. Carefully remove the paper and examine the unfused toner on the page. If the streaks are already present on the unfused toner, the issue lies with the toner cartridge, OPC drum, or transfer belt. If the print is clean before it reaches the fuser, the fuser roller is damaged and must be replaced.
- Inspect the OPC Drum for Physical Damage: Remove the toner cartridge or drum unit and examine the shiny, cylindrical green or blue drum. Look for scratches, pinholes, or rings of worn-out coating. Any physical defect on the drum surface will transfer to the paper as a permanent streak. If you find scratches, you must replace the drum unit.
- Clean or Replace the Waste Toner Bottle: In laser printers, excess toner is scraped off the drum and deposited into a waste container. If this container is full, the excess powder will spill back onto the drum and transfer belt, creating thick, dark streaks across your prints. Empty or replace the waste toner bottle according to your manufacturer’s instructions.
Safety Warning: Laser fusers operate at extremely high temperatures (often exceeding 350°F / 175°C). Always turn off the printer, unplug it from the wall, and allow it to cool down for at least 30 to 45 minutes before touching any internal components near the fuser assembly.
Smudged or Blurry Text
Smudged, blurry, or double-imaged text is a frustrating print defect that can occur in both inkjet and laser systems. When text appears blurry, it is often a sign of mechanical misalignment or a failure in the media delivery system. In inkjet printers, this is frequently caused by a dirty encoder strip.
The encoder strip is a thin, clear plastic band that runs horizontally across the width of the printer, positioned just behind the printhead carriage. It contains microscopic vertical lines that the printhead’s optical sensor reads to determine its exact horizontal position. If a speck of dust, grease, or ink gets onto this strip, the sensor misreads its position, causing the printhead to fire at the wrong moment. This results in misaligned, blurry, or double-printed text.
To clean a dirty encoder strip safely, follow these steps:
- Turn off the printer and unplug the power cable. Open the main access cover.
- Locate the clear plastic strip running parallel to the metal carriage rod.
- Lightly moisten a clean, lint-free microfiber cloth with distilled water or isopropyl alcohol. Caution: Do not use excessive force or harsh chemicals, as you can easily rub off the microscopic positioning marks on the strip.
- Gently pinch the strip with the cloth and wipe it from one side to the other. Repeat this process until no ink residue shows on the cloth.
- Let the strip dry completely before plugging the printer back in and running a test print.
In laser printers, smudged or blurry text usually points to a failing fuser unit or incorrect media settings. If the fuser does not reach the correct temperature, it cannot melt the toner powder into the paper fibers. As a result, the toner will rub off easily when you touch the page, leaving smudges. Check your printer driver settings to ensure the media type matches the paper you are using. Heavy cardstock requires a higher fuser temperature than standard copy paper; if your driver is set to “Plain Paper” while printing on cardstock, the toner will not fuse properly.
Printer Goes Offline During Troubleshooting
When you are in the middle of diagnosing print quality issues, running test prints, or executing alignment checks, there is nothing more frustrating than having your printer suddenly disconnect. If your computer loses communication with the printer, you will not be able to send diagnostic commands or print test patterns to see if your adjustments worked.
Connectivity dropouts often happen when the printer enters a deep power-saving mode, when the print spooler service in Windows crashes, or when there is a driver conflict. If you find yourself locked out of your device mid-repair, you will need to know how to fix printer offline errors to restore the communication channel. Often, a quick restart of the Windows Print Spooler service will clear the communication logjam. To do this, open the Windows Services app, locate “Print Spooler,” right-click it, and select “Restart.”
If the issue persists, you must investigate the underlying cause of the disconnect. Understanding why is my printer offline involves checking the physical connection cables, verifying that the printer is set as the default device in your operating system, and ensuring that “Use Printer Offline” is not checked in your print queue settings. Additionally, USB hubs can sometimes power down inactive ports; if you are troubleshooting via USB, connect the cable directly to a port on the computer’s motherboard rather than an external hub.

Network and IP Configuration Issues
For network-connected printers, troubleshooting is heavily dependent on a stable local network connection. If your printer relies on Wi-Fi or an Ethernet connection, a change in your router’s IP address allocation can break the link between your computer and the printer. This is especially common if your router reboots and assigns a new dynamic IP address to the printer while your computer is still trying to send data to the old address.
To verify your connection, you must first ensure the printer is properly connected to your local network. If you are setting up the device on a new network or re-establishing a lost connection, you should review the steps on how to connect printer to wifi. Make sure your printer is broadcasting on the correct frequency band; many older printers only support 2.4 GHz Wi-Fi networks and will fail to connect if your router is only broadcasting a 5 GHz signal under the same network name.
Once the printer is connected to the network, you need to verify its network address. Knowing how to find printer ip address is essential for advanced network troubleshooting. You can find this address by printing a network configuration page directly from the printer’s control panel, or by checking your router’s DHCP client list. Once you have the IP address, open a command prompt on your computer and type ping [printer's IP address]. If you receive replies, the hardware connection is active, and any remaining offline issues are likely caused by incorrect port settings in your Windows printer properties.
To prevent future IP address conflicts, open your printer’s embedded web server (EWS) by typing its IP address into a web browser. From there, navigate to the network settings and change the IP configuration from DHCP (Dynamic) to Manual (Static). Assigning a static IP address ensures your printer always resides at the same network location, preventing communication dropouts during future troubleshooting sessions.
FAQ
Why does my printer have white lines through the text?
White lines running horizontally through printed text are almost always caused by a clogged or dirty printhead nozzle in inkjet printers. When ink dries inside the microscopic nozzles, it blocks the flow of fresh ink, leaving blank spaces as the printhead moves back and forth across the page. To resolve this, run a printhead cleaning cycle through your printer’s maintenance software. If you are using a laser printer, white lines running vertically down the page usually indicate that the OPC drum is scratched, the laser glass is dirty, or the toner is running low and cannot distribute evenly across the developer roller. Gently shaking the toner cartridge from side to side can temporarily resolve the issue, but you will eventually need to replace the cartridge or the drum unit.
Can I use rubbing alcohol to clean my printer rollers?
No, you should avoid using standard rubbing alcohol (isopropyl alcohol) on rubber printer rollers. While alcohol is an excellent solvent for cleaning metal parts and electronic contacts, it dries out rubber. Over time, repeated applications of rubbing alcohol will cause the rubber feed rollers to harden, crack, and lose their grip, leading to frequent paper jams and feeding errors. Instead, clean rubber rollers using a lint-free microfiber cloth lightly moistened with distilled water. If the rollers are extremely dirty or slick, use a specialized rubber roller rejuvenator or a mild soap-and-water solution, ensuring you dry the rollers completely before printing.
How often should I clean my printer?
The ideal cleaning frequency depends on your printing volume and the environment in which the printer operates. For average home use, performing a basic inspection and cleaning every six months is sufficient. If you use your printer daily in a busy office environment, or if the printer is located in a dusty warehouse, you should clean it every two to three months. Inkjet printers should be used at least once a week to prevent the ink from drying and clogging the nozzles. For laser printers, clean the interior cavity every time you replace the toner cartridge to prevent toner dust and paper fibers from building up on the internal sensors and rollers.
Why is my laser printer printing black streaks down the side of the page?
Black streaks running down the side of a laser-printed page are typically caused by a damaged or dirty OPC (Organic Photo Conductor) drum, a failing fuser roller, or a worn-out wiper blade. The wiper blade is responsible for scraping excess toner off the drum and into the waste bin. If this blade is nicked or worn, it leaves a thin line of toner on the drum, which transfers to the paper. Alternatively, if the fuser roller has a scratch or a buildup of baked-on toner, it will press that defect onto every page that passes through it. Check the OPC drum for visible rings of toner or physical scratches. If the drum is clear, inspect the fuser roller for damage; if either component is physically compromised, it must be replaced.
Conclusion
Diagnosing and fixing printer streaks does not have to be a frustrating, trial-and-error process. By understanding the mechanical differences between inkjet and laser printing technologies, you can systematically isolate the root cause of your print quality issues. Whether the culprit is a clogged printhead nozzle, a scratched OPC drum, a dirty encoder strip, or a simple network disconnect, most printer problems can be resolved at home with patience, basic tools, and the right maintenance steps.
Remember that prevention is the most effective tool in your arsenal. Using high-quality paper, printing a test page weekly, and keeping your printer’s firmware updated will prevent the buildup of dust and dried ink that leads to streaks. By establishing a routine cleaning schedule and addressing connectivity issues promptly, you can extend the lifespan of your printer and ensure that every document you print is clean, sharp, and professional.