
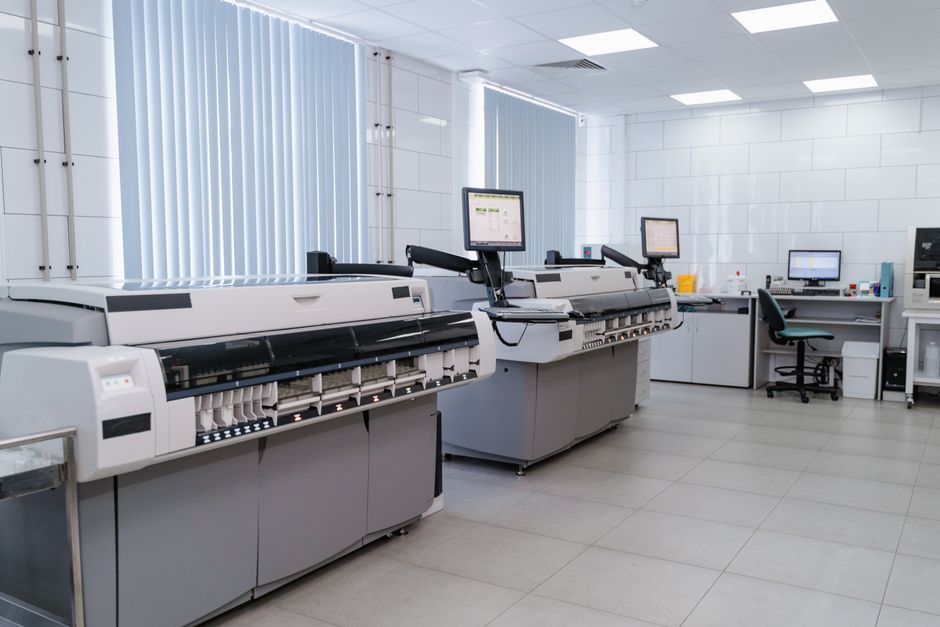
Introduction to 3D Printer Enclosures
3D printer enclosures are specially designed structures that surround a 3D printer during its operation. They serve multiple purposes, catering to both hobbyists and professionals alike. By creating a controlled environment, enclosures help ensure optimal printing conditions, ultimately leading to better results and a safer workspace. As the popularity of 3D printing continues to grow, understanding the significance of enclosures becomes increasingly important.
Whether you are a seasoned expert or just beginning your journey into the world of 3D printing, an enclosure can be a valuable addition to your setup. It not only enhances print quality but also addresses various safety and environmental factors that can arise during the printing process.
Benefits of Using a 3D Printer Enclosure
Utilizing a 3D printer enclosure offers numerous advantages that can greatly improve your printing experience. Here are some of the primary benefits associated with using an enclosure.
Improved Print Quality
One of the most significant advantages of having a 3D printer enclosure is the improvement in print quality. Maintaining a consistent temperature is crucial for successful 3D printing, especially when working with materials that are prone to warping, such as ABS. Enclosures help to regulate the ambient temperature around the printer, preventing drafts and sudden temperature fluctuations that can adversely affect print adhesion and layer bonding.
By keeping the temperature stable, enclosures reduce the chance of warping and cracking, leading to more precise and reliable prints. This is particularly important for larger models that require a stable environment to ensure every layer adheres properly during the printing process.
Safety Considerations
Safety is another critical aspect to consider when using a 3D printer. Many printing materials release fumes during the heating process, which can be harmful if inhaled over prolonged periods. A closed enclosure minimizes the exposure to these fumes, ensuring that the workspace remains safe for users.
Additionally, enclosures help mitigate the risk of fire hazards. 3D printers operate at high temperatures, and having an enclosure can contain any potential fire hazards, preventing flames from spreading in case of an emergency. This is especially crucial in home settings or areas where flammable materials may be present.
Noisy Environment Reduction
3D printers can be quite noisy during operation, which may not be ideal for shared workspaces or homes. Enclosures can significantly dampen the noise produced by the printer, creating a quieter and more pleasant environment. This reduction in noise pollution allows users to concentrate better, making it easier to work on other projects simultaneously or enjoy a peaceful atmosphere.
Dust and Contaminant Protection
Dust and other contaminants can negatively impact print quality, leading to surface imperfections and adhesion problems. A 3D printer enclosure acts as a barrier, protecting your prints from dust, pet hair, and other particles that could interfere with the printing process. By keeping the printing area clean and contaminant-free, enclosures contribute to producing higher-quality, more reliable prints.
Types of 3D Printer Enclosures
When it comes to 3D printer enclosures, there is a wide variety to choose from. Each type serves different needs and preferences, allowing users to select the best option for their setup. Below are the two main categories of enclosures: commercial and DIY.
Commercial Enclosures
Commercial enclosures are ready-made solutions designed specifically for 3D printers. These enclosures come in various sizes and styles, often featuring clear panels for visibility and easy access to the printer. Many commercial options include built-in ventilation systems and temperature control features to optimize the printing environment.
Some notable features of commercial enclosures include:
- Durability: Made from high-quality materials that can withstand the heat and stress of printing.
- Mobility: Some models come with wheels for easy movement, allowing you to reposition your printer as needed.
- Accessibility: Many enclosures are designed for easy access, with doors or removable panels that facilitate maintenance and monitoring of prints.
DIY Enclosures
For those who enjoy hands-on projects, building a DIY enclosure can be a rewarding experience. Creating your own enclosure allows for customization based on your specific printer model, space constraints, and personal preferences. To build a DIY enclosure, you’ll need a few materials and tools:
- Materials: Acrylic sheets, wood, or metal framing materials; insulation material; hinges for doors; and a fan for ventilation.
- Tools: A saw (for cutting materials), screws, a drill, and a measuring tape.
Here are the general steps for constructing a DIY enclosure:
- Measure your printer’s dimensions to determine the size of the enclosure.
- Cut your materials according to the measurements.
- Assemble the frame and attach the walls securely.
- Add doors for easy access and ventilation openings to regulate airflow.
- Finish by adding insulation and any additional features you desire.
Building your own enclosure not only saves money but also allows for a personalized touch that can tailor the enclosure to your specific needs.
Modular Enclosures
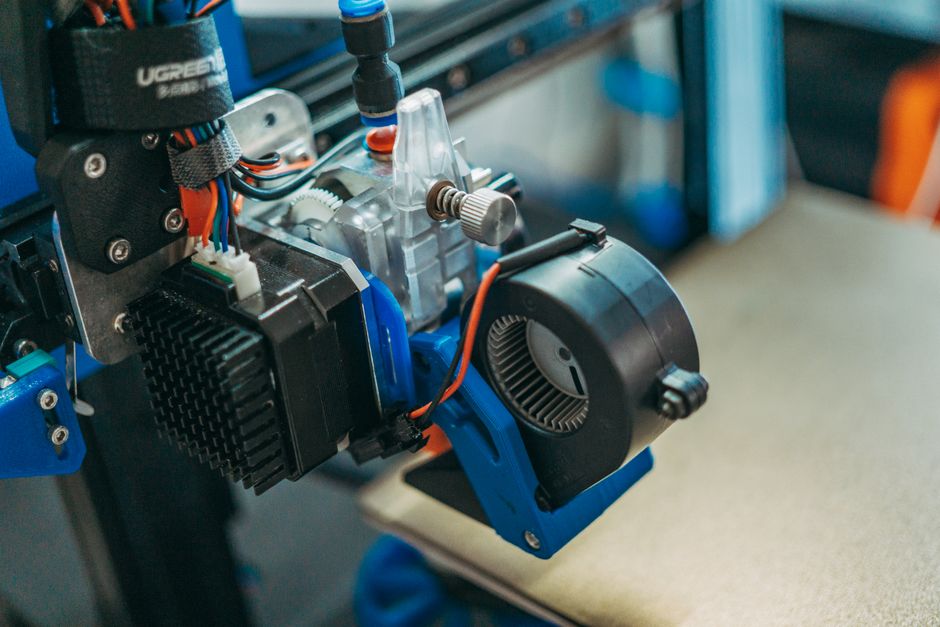
Modular enclosures are an excellent choice for users who require flexibility and adaptability in their 3D printing setups. These enclosures can be adjusted or expanded based on specific needs, making them suitable for a variety of printer sizes and configurations. The modular design allows users to customize the enclosure according to their workspace, print volume, and future upgrades.
One of the main benefits of modular enclosures is their scalability. As your printing needs change—whether it’s upgrading to a larger printer or adding more printers to your setup—you can easily modify the enclosure without needing to invest in a completely new structure. This adaptability is especially valuable for hobbyists and professionals alike who may frequently alter their printing configurations.
Moreover, modular enclosures often come with interchangeable panels and components. For instance, you can add additional sections to increase the height or width of the enclosure, or even integrate specialized compartments for filament storage or tools. This can lead to a more organized workspace, minimizing clutter and enhancing efficiency as you print.
Another aspect to consider is the ease of assembly and disassembly. Many modular enclosures are designed for quick setup, allowing users to reconfigure their spaces as needed. This is particularly advantageous for those who might need to relocate their printers frequently or who want the flexibility to adjust their workspace layout.
In addition, considering the material used in modular enclosures is crucial. Opting for high-quality, durable materials will ensure that the enclosure withstands the test of time. The right materials can also provide better insulation, reducing the noise levels and maintaining optimal printing temperatures.
Overall, modular enclosures provide a versatile solution that can grow with your printing needs while offering convenience and organizational benefits.
How to Choose the Right Enclosure for Your 3D Printer
Selecting the right enclosure for your 3D printer is essential for optimizing both print quality and the overall user experience. Various factors should be considered to ensure that the enclosure suits your printer’s specifications and your workspace requirements effectively.
Size and Compatibility
The first step in choosing an enclosure is to determine the appropriate size and compatibility with your specific 3D printer model. Different printers come in various dimensions, so it’s crucial to measure your printer accurately, including height, width, and depth.
When assessing size, ensure that there is enough clearance around the printer for maintenance, loading filament, and removing prints. Additionally, consider any accessories or upgrades that you might plan to integrate in the future, such as larger build plates or additional extruders, and factor these into your size calculations.
Compatibility also means ensuring that the enclosure can accommodate the printer’s features, such as heated beds or filament drying systems. Some printers may require additional ventilation or heat management that should be taken into account when selecting an enclosure.
Moreover, if you own multiple printers or plan to purchase more in the future, it may be wise to choose an enclosure that can accommodate different models or configurations, providing the flexibility needed as your 3D printing journey evolves.
Material Choices
The material of the enclosure plays a significant role in its performance and longevity. Various materials are available, each with its own set of pros and cons. Common options include acrylic, polycarbonate, wood, and metal.
- Acrylic: Lightweight and transparent, acrylic allows for easy visibility of the printing process. However, it may not provide the same level of insulation as other materials and can scratch easily.
- Polycarbonate: This material is highly durable and offers better insulation than acrylic. It can withstand higher temperatures, making it suitable for high-performance printers.
- Wood: Wooden enclosures can provide excellent insulation and are often aesthetically pleasing. However, they may require additional treatment to handle moisture and heat effectively.
- Metal: Metal enclosures are extremely durable and can provide excellent thermal regulation. However, they can be heavier and more expensive than other materials.
Consider your specific needs when selecting a material. If you are printing with high-temperature filaments, you may need a material that can withstand the heat without warping. Additionally, think about aesthetics, durability, and maintenance when making your choice.
Cost Considerations
Budgeting for a 3D printer enclosure is another important factor to keep in mind. While it might be tempting to choose the cheapest option available, it’s crucial to balance cost with quality and features. A higher-priced enclosure may offer better insulation, durability, and safety features, which can lead to improved print quality and a safer workspace.
When evaluating costs, consider not just the initial purchase price but also the long-term value. Investing in a quality enclosure can reduce future expenses related to print failures, maintenance, or safety issues caused by inadequate enclosures.
Furthermore, explore different purchasing options. While commercial enclosures can be convenient, DIY solutions can also be cost-effective and allow for customization. Weighing the benefits of each option against your budget will help you make an informed decision that meets your needs without overspending.
Building Your Own 3D Printer Enclosure
Creating a DIY 3D printer enclosure can be a fulfilling project that allows for customization tailored to your specifications. With the right materials and a clear plan, you can construct an enclosure that meets your needs effectively.
Materials Needed
Before beginning construction, gather all the essential materials and tools required for building your enclosure. Typical materials may include:
- Acrylic or Polycarbonate Sheets: For the walls, providing visibility while maintaining insulation.
- Wood or Metal Framing: To create a sturdy framework for the enclosure.
- Insulation Material: To improve thermal regulation and reduce noise.
- Hinges: For doors to allow easy access to the printer.
- Fans: For ventilation to help manage heat and fumes.
- Fasteners: Screws, brackets, and glue for assembly.
Tools you may need include a saw for cutting the materials, a drill for making holes, a measuring tape for accurate dimensions, and a screwdriver for assembly.
Step-by-Step Construction
Once you have your materials and tools ready, you can start constructing your enclosure. Follow these detailed steps:
- Measure and Plan: Start by measuring your 3D printer’s dimensions to determine the appropriate size for your enclosure. Create a simple blueprint to visualize the layout.
- Cut Materials: Using the saw, cut your framing materials and wall panels according to your measurements.
- Assemble the Frame: Construct the frame by connecting the wood or metal pieces with screws or brackets, ensuring it is stable and square.
- Attach the Walls: Secure the acrylic or polycarbonate sheets to the frame using brackets or adhesive, ensuring a tight fit to prevent drafts.
- Add Doors: Install hinges on one side of the enclosure to create doors for easy access to the printer.
- Incorporate Ventilation: Cut holes for fans or vents, ensuring proper airflow to maintain optimal conditions inside the enclosure.
- Final Assembly: Double-check all connections and ensure everything is secure before moving the enclosure to its final location.
Finishing Touches
Once your enclosure is constructed, consider adding finishing touches to enhance functionality and usability:
- Ventilation: Ensure that the fans are installed and functional to maintain air circulation and regulate temperature.
- Lighting: Adding LED lighting inside the enclosure can help you monitor your prints without opening the doors.
- Storage Solutions: Consider adding shelves or compartments within or on the outside of the enclosure for easy access to tools and materials.
- Sealing Edges: Use weather stripping to seal any gaps and improve insulation, preventing temperature fluctuations and dust entry.
With these steps completed, your DIY enclosure will be ready to use, providing a tailored space that enhances your 3D printing experience.
Maintaining Your 3D Printer Enclosure
Proper maintenance of your 3D printer enclosure is essential for ensuring its longevity and functionality. Regular upkeep helps maintain optimal printing conditions and keeps your workspace organized and safe.
To keep your enclosure in top shape, follow these best practices:
- Regular Cleaning: Dust and debris can accumulate inside the enclosure, affecting print quality. Regularly wipe down surfaces and vacuum any loose particles to maintain a clean environment.
- Check for Damage: Periodically inspect the enclosure for any signs of wear or damage, such as cracks in the panels or loose hinges. Address any issues promptly to prevent further deterioration.
- Maintain Ventilation: Ensure that fans are functioning correctly and not obstructed by dust or debris. Clean the fan filters regularly to maintain effective airflow.
- Monitor Temperature: Keep an eye on the internal temperature of the enclosure, especially if you are using high-temperature materials. Consider using temperature sensors to help manage heat levels.
By adhering to these maintenance tips, you can ensure that your 3D printer enclosure remains an effective, safe, and efficient environment for all your printing endeavors.
Regular Cleaning
Maintaining a clean 3D printer enclosure is vital for the longevity of both the enclosure and the printer itself. Dust, debris, and filament particles can accumulate over time, potentially affecting print quality and the overall working environment. To clean your enclosure without damaging the printer, follow these steps:
- Turn Off the Printer: Always ensure the printer is turned off and cooled down before starting the cleaning process. This prevents any accidental damage or injury.
- Use a Soft Cloth: Select a microfiber cloth or soft, lint-free cloth to avoid scratching surfaces. Dampen it slightly with water or a mild cleaning solution, ensuring it is not dripping wet.
- Wipe Down Surfaces: Gently wipe down all interior surfaces of the enclosure, including walls, shelves, and the floor. Pay special attention to areas where dust tends to collect, such as corners and around the printer.
- Vacuum Loose Particles: Use a small handheld vacuum or a vacuum attachment to remove loose particles from the enclosure. Be cautious around sensitive components and wiring.
- Clean the Printer: While cleaning the enclosure, take the opportunity to clean the printer itself. Use a soft brush to remove filament debris from the nozzle and a cloth to clean any exposed surfaces.
- Check Filters: If your enclosure has ventilation filters, remove and clean or replace them as needed. This helps maintain proper airflow and prevents dust from entering the enclosure.
Regular cleaning not only enhances the aesthetics of your workspace but also promotes better printing results by providing a clean environment for your 3D printer.

Inspecting for Damage
Regular inspection of your 3D printer enclosure is crucial to identify any wear and tear before it becomes a more significant issue. Here’s what to look for:
- Check Panels for Cracks: Inspect the walls and doors of the enclosure for any cracks or chips. Even minor damage can lead to energy loss or insufficient insulation, affecting print quality.
- Examine Hinges and Fasteners: Ensure that all hinges are functioning correctly and that doors open and close smoothly. Tighten any loose screws or brackets to maintain structural integrity.
- Inspect Seals: Look for any gaps in the seals around doors and panels. If seals are worn or damaged, consider replacing them to improve insulation and airflow control.
- Assess the Ventilation System: Check that fans are operating effectively and that there is no obstruction preventing airflow. Listen for unusual noises that might indicate a malfunction.
- Look for Signs of Wear: Pay attention to any signs of wear on internal components, such as shelves or mounts. Replace or repair items that show significant degradation.
By regularly inspecting your enclosure for damage, you can address minor issues before they escalate, ensuring a more reliable printing experience.
Updating Features
As your 3D printing needs evolve, you may find it beneficial to upgrade the features of your enclosure. Here’s when and how to do it effectively:
- Evaluate Your Needs: Consider the types of materials you are printing with and if they require specific environmental conditions. High-temperature materials may necessitate better insulation or heating capabilities.
- Consider Upgrading Ventilation: If you notice overheating or poor print quality, upgrading your ventilation system with more powerful fans or adding additional vents can help regulate temperature and airflow.
- Enhance Lighting: If you find it difficult to monitor your prints, adding LED lights can improve visibility inside the enclosure. This also allows you to check on prints without opening the doors.
- Integrate Temperature Monitoring: Installing digital temperature gauges or sensors can help you monitor internal conditions more accurately. This information is vital for maintaining optimal printing environments.
- Upgrade Materials: If your enclosure is made from less durable materials, consider upgrading to stronger options, such as thicker acrylic or polycarbonate, to enhance insulation and durability.
Upgrading features in your 3D printer enclosure ensures it meets your evolving printing requirements and helps maintain optimal conditions for successful prints.
Common Issues and Troubleshooting
Even with proper maintenance, you may encounter some common issues with your 3D printer enclosure. Identifying and solving these problems can help ensure smooth printing operations.
Temperature Fluctuations
Temperature fluctuations inside the enclosure can lead to poor print quality, warping, or adhesion issues. Here are some ways to stabilize the temperature:
- Insulate the Enclosure: Ensure that your enclosure is well-insulated to maintain a constant temperature. Adding insulation materials to the walls can help reduce heat loss.
- Use a Dedicated Heater: If you are printing with materials that require higher temperatures, consider installing a dedicated heater or heat mat designed for 3D printer enclosures.
- Monitor Temperature Regularly: Utilize temperature sensors to track the internal temperature. This will help you make adjustments as needed, especially during long print jobs.
- Avoid Opening the Doors: Minimize the frequency of opening the enclosure doors during printing to maintain a stable temperature environment.
Ventilation Issues
Proper ventilation is essential for preventing overheating and ensuring a safe printing environment. Here’s how to address ventilation issues:
- Check Fan Functionality: Regularly inspect and maintain the fans to ensure they are operating effectively. Replace any that are malfunctioning or making unusual noises.
- Clear Obstructions: Ensure there are no obstructions in the airflow path. Dust and debris can block vents and reduce airflow efficiency.
- Install Additional Vents: If you notice persistent overheating, consider adding more vents or adjustable louvers to improve airflow and heat dissipation.
- Use Activated Carbon Filters: If you’re printing with materials that emit fumes, consider installing activated carbon filters to help manage odors and maintain air quality.
Noise Levels
Excessive noise from your 3D printer can be disruptive, especially in a home or shared workspace. Here are some strategies for reducing noise levels:
- Add Soundproofing Material: Line the interior walls of the enclosure with soundproofing foam or acoustic panels to dampen noise generated by the printer.
- Ensure Stability: Check that the enclosure is stable and all components are tightly secured. Vibrations can cause additional noise, so ensure everything is properly assembled.
- Isolate the Printer: Consider placing the printer on vibration-dampening pads or mats to absorb noise and prevent vibrations from transferring through the enclosure.
- Upgrade to Quieter Fans: If the fans are contributing to noise levels, replace them with quieter models designed for low-noise operation.
Conclusion
Maintaining a 3D printer enclosure is crucial for achieving high-quality prints and ensuring a safe, efficient workspace. Regular cleaning, inspection for damage, and updates on features can significantly enhance your printing experience. Additionally, being aware of common issues and troubleshooting them promptly will help you maintain optimal conditions for your 3D printing endeavors.
As you reflect on your own 3D printer setup, consider how an effective enclosure can improve your printing results, protect your equipment, and create a better working environment.
FAQ
What materials are best for building a 3D printer enclosure?
The best materials for a 3D printer enclosure include acrylic, polycarbonate, or plywood. These materials provide good insulation, durability, and visibility for monitoring prints.
How often should I clean my 3D printer enclosure?
It’s advisable to clean your 3D printer enclosure at least once a month, or more frequently if you notice dust accumulation or after extensive printing sessions.
Can I use a heater inside the enclosure?
Yes, you can use a heater designed for 3D printer enclosures to maintain a stable temperature, especially when printing with high-temperature materials. Ensure it is safely installed and monitored.
What should I do if my enclosure is too noisy?
If your enclosure is too noisy, consider soundproofing materials, ensuring the printer is stable, and replacing fans with quieter models to reduce noise levels.