
Introduction
Laser printers are renowned for their efficiency, speed, and high-quality prints, making them a popular choice for both home and office use. However, users often encounter frustrating issues, one of the most common of which is the appearance of stripes on printed documents. These stripes can detract from the overall quality of printouts and lead to wasted resources and time. Understanding this issue is crucial for maintaining optimal printer performance and ensuring that your documents look professional.
This article delves into the causes of stripes in laser printers, their significance, and the various factors that contribute to this problem. By addressing these issues promptly, users can enhance their printing experience and prolong the lifespan of their devices.

Understanding Laser Printer Stripes
What Causes Stripes in Laser Printouts?
Stripes on laser printouts can stem from a variety of hardware and software issues. The complexity of laser printers means that several components work together to produce a flawless print, and when one part malfunctions, it can lead to unsightly stripes.
Common causes include:
- Inadequate Toner Supply: Low toner levels can lead to faint or missing stripes in your prints.
- Drum Unit Issues: Problems with the drum unit can lead to uneven toner distribution.
- Paper Quality: Using incompatible or low-quality paper can affect the printing process.
- Dirty Components: Dust and debris can interfere with the printing mechanism.
- Software Problems: Incorrect printer settings or outdated drivers can cause formatting issues.
Identifying the root cause of the stripes is essential for implementing the correct solution, ensuring smooth operation for users.
Types of Stripes and Their Implications
Stripes can manifest in various forms, and recognizing the type can help in diagnosing the underlying problem.
- Horizontal Stripes: These typically indicate issues with the toner cartridge or drum unit. They may also suggest that the printer is not functioning correctly due to mechanical problems.
- Vertical Stripes: Often linked to a dirty or damaged drum, vertical stripes can also indicate that the paper is misaligned or that the printer’s internal components are not clean.
Understanding the types of stripes can guide users in troubleshooting their printers effectively.
Common Causes of Stripes in Laser Printers
Low or Incompatible Toner
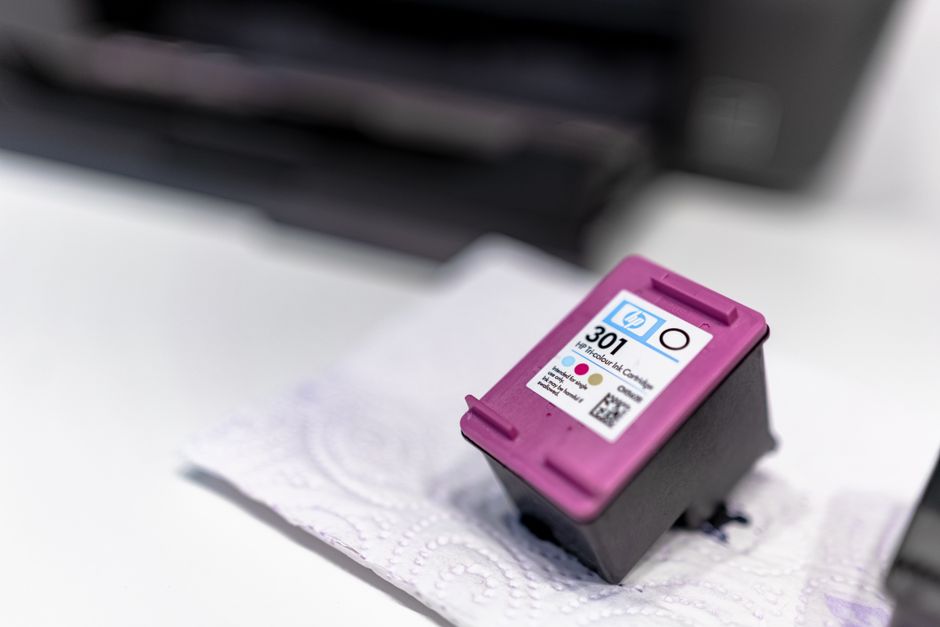
Toner is the lifeblood of laser printing, and using low-quality or incompatible toner can significantly impact print quality. When the toner levels are low, the printer struggles to distribute the toner evenly across the drum, leading to stripes in the prints. Additionally, using a toner cartridge that is not compatible with your printer can result in poor print quality and operational issues.
To avoid toner-related problems, ensure that you are using high-quality, manufacturer-recommended toner cartridges. Regularly check toner levels and replace cartridges promptly to maintain optimal printing conditions.
Drum Unit Problems
The drum unit plays a crucial role in the laser printing process by transferring the toner to the paper. Over time, the drum can wear out or become damaged, leading to uneven toner application and the appearance of stripes. A worn drum may also fail to hold the toner properly, resulting in faded areas in addition to stripes.
To prevent drum-related issues, it’s advisable to replace the drum unit as recommended by the manufacturer. Regular maintenance and cleaning can also extend the life of the drum and improve print quality.
Paper Issues
Believe it or not, the type and quality of paper you use can have a significant impact on print quality. Poor-quality paper can absorb toner unevenly, leading to stripes and other print defects. Additionally, using the wrong type of paper for your printer can cause misfeed issues, resulting in stripes or incomplete prints.
To improve print quality, always opt for high-quality paper that is compatible with your laser printer. Refer to your printer’s manual for recommended paper types and weights to avoid complications.
Dirty Printer Components
Dust and debris can accumulate on internal printer components, leading to various printing issues, including stripes. Key components that may require regular cleaning include:
- Fuser: This component bonds the toner to the paper. If dirty, it can lead to smudges and stripes.
- Rollers: These help feed the paper through the printer. If they are dirty, they may not grip the paper correctly, causing misalignments and stripes.
- Drum: As mentioned earlier, a dirty drum can lead to uneven toner application.
Regular maintenance, including cleaning the printer’s interior and components, can help ensure that your laser printer operates smoothly and produces high-quality prints.
Step-by-Step Troubleshooting Guide
Checking Toner Levels
The first step in resolving the issue of stripes in your prints is to check the toner levels. Low toner can disrupt the even distribution required for clear, stripe-free printing.
- Access the Printer: Open the printer cover and locate the toner cartridge. This is typically at the front or top of the printer, depending on the model.
- Check Toner Levels: Most printers have a display that shows the toner levels. If not, you might need to remove the cartridge and check the gauge on the cartridge itself. If the toner is low or empty, proceed to the next step.
- Replace the Toner Cartridge: If the toner is low:
- Remove the old cartridge by pulling it straight out. Be careful not to spill any toner.
- Unpack the new toner cartridge and gently shake it to distribute the toner evenly.
- Install the new cartridge by sliding it back into the printer until it clicks into place.
After replacing the toner, run a test print to check if the stripes have disappeared.
Inspecting the Drum Unit
The drum unit is essential for transferring toner onto paper. If it is damaged or dirty, it can result in stripes appearing on your printouts.
- Access the Drum Unit: Open the printer cover and carefully remove the toner cartridge. The drum unit will be visible.
- Inspect for Damage: Look for scratches, dents, or any visible wear on the drum surface. If it appears worn or damaged, it will need replacing.
- Cleaning the Drum: If the drum is dirty:
- Use a soft, lint-free cloth to gently wipe the drum surface. Avoid using any solvents or cleaning agents that could damage it.
- Ensure that the cleaning is done gently to avoid scratching the surface.
- Replace the Drum Unit: If cleaning doesn’t resolve the issue or if the drum is damaged, replace it by removing it from the printer and installing a new one according to the manufacturer’s instructions.
After inspecting and cleaning or replacing the drum, run a test print to see if the stripes have been resolved.
Cleaning Printer Components
Regular cleaning of your printer’s components is vital for maintaining print quality. Dust and debris can lead to stripes and other print quality issues.
- Turn Off the Printer: Ensure the printer is turned off and unplugged before cleaning to avoid any accidents.
- Clean the Fuser:
- Locate the fuser, typically found just before the paper exit area.
- Use a soft cloth to wipe away any toner residue or dust. Be cautious as the fuser can get hot.
- Clean the Rollers:
- Locate the rollers that feed the paper through the printer.
- Use a damp cloth or a cotton swab with a little isopropyl alcohol to wipe them clean.
- Final Check: After cleaning, ensure all components are dry before closing the printer. Plug it back in and power it on.
Performing this cleaning process regularly can prevent issues and maintain high-quality prints.
Adjusting Print Settings
Sometimes, the solution to stripe problems can be as simple as adjusting your print settings. Incorrect settings can lead to poor print quality.
- Open Print Settings: On your computer, open the document you want to print and navigate to the print settings.
- Select Print Quality: Look for options related to print quality. Set it to a higher quality setting, such as “Best” or “High Quality.”
- Check Paper Type: Ensure the paper type setting matches the type of paper you are using (e.g., plain, glossy, etc.). This can prevent misalignment and improve print quality.
- Run a Test Print: After making adjustments, print a test page to see if the quality has improved.
Adjusting these settings can often resolve minor issues and enhance print quality significantly.
Using the Right Paper
The type and quality of paper you use can greatly influence the outcome of your prints. Using the right paper helps avoid issues like stripes.
- Paper Quality: Always choose high-quality paper that is designed for laser printers. Low-quality paper can absorb toner unevenly, leading to stripes.
- Paper Weight: Check the printer specifications for recommended paper weights. Using paper that is too thick or too thin can cause feeding issues.
- Storage: Store paper in a cool, dry place to prevent moisture absorption, which can lead to feeding issues.
By using high-quality, suitable paper, you can ensure better print results and minimize the risk of stripes.
Advanced Troubleshooting Techniques
Firmware Updates
Keeping your printer’s firmware up to date is crucial for optimal performance. Firmware updates can fix bugs, enhance compatibility, and improve print quality.
- Check Current Firmware: Access the printer’s menu to find the current firmware version.
- Visit the Manufacturer’s Website: Go to the support section of your printer manufacturer’s website to check for available updates.
- Download and Install: Follow the instructions provided to download and install any available firmware updates. This often involves connecting the printer to your computer or network.
After updating, print a test page to verify improvements.
Recalibrating the Printer
Sometimes, recalibrating your printer can resolve issues with print quality, including stripes.
- Access the Printer Menu: Using the printer’s control panel, navigate to the settings or maintenance section.
- Find Calibration Options: Look for options like “Calibrate” or “Print Quality Adjustment” and select it.
- Follow Instructions: The printer will provide on-screen instructions. Follow them carefully to complete the calibration process.
Once recalibrated, print a test page to check for any improvements in print quality.
Seeking Professional Help
If you have tried all the above steps and still experience issues, it may be time to consult a professional technician.
- When to Seek Help: If problems persist after troubleshooting, or if you notice unusual noises or error messages, professional help is advisable.
- What to Expect: A technician will diagnose the problem, which may involve inspecting components, replacing parts, or performing advanced repair techniques.
While seeking help may incur costs, it can save you time and potentially extend the life of your printer.
Preventive Measures to Avoid Future Stripes
Regular Maintenance Tips
To avoid stripes in the future, implementing regular maintenance practices is essential.
- Routine Cleaning: Schedule regular cleanings of your printer’s components, including the drum, rollers, and fuser.
- Toner and Drum Checks: Regularly check toner levels and inspect the drum for wear to prevent issues before they occur.
- Usage Guidelines: Follow the manufacturer’s usage guidelines for paper and toner to maintain optimal performance.
Choosing Quality Supplies
Using high-quality toner and paper can significantly impact your printer’s performance and longevity.
- Manufacturer’s Recommendations: Always opt for toner and paper that meet the manufacturer’s specifications for your printer model.
- Reputable Brands: Choose reputable brands known for their quality to minimize issues.
User Education
Understanding your printer’s functionalities can help you utilize it more effectively and avoid problems.
- Read the Manual: Familiarize yourself with the printer’s manual, which includes troubleshooting tips and maintenance guidelines.
- Stay Informed: Keep abreast of any updates on best practices and technological advancements related to your printer model.
By educating yourself, you can maximize your printer’s performance and minimize the likelihood of experiencing stripes in your prints.
Conclusion
Addressing laser printer stripes is not just a matter of aesthetics; it directly impacts the quality of your printed documents. Stripes can indicate underlying problems that, if left unresolved, may lead to more significant issues down the line. By following the troubleshooting steps outlined in this guide, you ensure that your printer operates efficiently, producing clear and professional-looking prints.
Moreover, consistent maintenance can prolong the life of your printer, saving you time and money in the long run. Whether you are an occasional user or rely on your laser printer for daily tasks, understanding how to troubleshoot and maintain it is essential for optimal performance. Remember, investing time in addressing these issues today can lead to better print quality and fewer frustrations tomorrow.
In conclusion, don’t ignore the signs of printing problems. With the correct approach, you can tackle laser printer stripes effectively, ensuring your printer remains a reliable tool in your home or office.
FAQs about Laser Printer Stripes
What should I do if my laser printer still has stripes after troubleshooting?
If your laser printer continues to produce stripes even after you have meticulously followed the troubleshooting steps, it may be time to consider a few additional options. First, verify that all components, such as the toner cartridge and drum, are correctly installed and not damaged. If they appear fine, consider replacing the toner cartridge or drum, as these parts can wear out over time and contribute to print quality issues.
If the problem persists, it may be beneficial to consult the user manual or the manufacturer’s support website for further guidance. In some cases, contacting a professional technician for an in-depth diagnosis may be necessary, especially if the printer exhibits other unusual behaviors.
Can using third-party toner cause stripes?
Yes, using third-party toner can lead to stripes and other print quality issues. While third-party toners may be more economical, they often lack the stringent quality controls that manufacturer-approved toners undergo. Inconsistent particle sizes and formulations can lead to uneven distribution during printing, resulting in stripes or faded prints.
If you experience issues after switching to third-party toner, consider reverting to the original manufacturer’s toner to see if the print quality improves. This will help you determine whether the toner is the root cause of the stripes.
How often should I perform maintenance on my laser printer?
Regular maintenance is crucial for keeping your laser printer in good working condition and preventing issues like stripes. It is generally recommended to perform maintenance every 1-3 months, depending on your printer’s usage frequency. Here are some specific maintenance tasks to consider:
- Cleaning: Clean the printer’s exterior and internal components, such as the drum and rollers, to remove dust and debris.
- Toner Checks: Regularly check toner levels and replace cartridges when they are low to avoid print quality degradation.
- Firmware Updates: Keep the printer’s firmware updated to ensure optimal performance and compatibility with your devices.
Additionally, if you notice any decline in print quality, it’s wise to conduct maintenance checks sooner rather than later.
Are there specific brands of paper that work better with laser printers?
Yes, the type of paper you use can significantly affect print quality. Laser printers work best with paper specifically designed for laser printing. Such paper is typically smoother and can withstand the high heat that laser printers generate during the fusing process.
When selecting paper, consider the following:
- Weight: Choose paper that is within the recommended weight range for your printer. Lighter paper may jam, while heavier paper can cause issues with feeding.
- Finish: A bright white finish is usually preferred, as it enhances the contrast of printed text and images.
- Brand Recommendations: Look for brands that are well-reviewed and specifically labeled for laser printers, as they are designed to yield better results.
Ultimately, using the right paper can enhance print quality and help prevent issues such as stripes.